New Web-Based Screen Capture Utility Now in Beta
October 27, 2008 by Victor · 3 Comments
Here at ScreenCaptureNews, we like all things that are simple to use and don’t cost an arm and a leg. ScreenToaster is a completely free exciting new web-based Java applet similar to ScreenCast-O-Matic. You can read our full review of ScreenCast-O-Matic here. While ScreenCast-O-Matic was an easy applet to use, we did find some problems, notably the ultra-low capture rate (~2fps), that took away from the usefulness of this application.
ScreenToaster is basically an online applet that records your screen or an area of your screen and then instantly publishes the recording to the web in Flash YouTube-like format for you to share with your peers or co-workers. This can come in extremely useful in situations where you need to demonstrate to someone how to use a piece of software, create instructional videos, or upload a video of your screen for others to see for troubleshooting purposes.
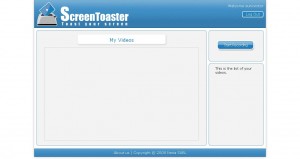
While ScreenToaster is still in Beta, you will need an activation key to use it. The activation key can be requested by going to the registration page of the ScreenToaster website. Once you have registered your user account and logged in, ScreenToaster will bring you to your control panel. From here, you will need to press “Start Recording” to launch the recording proccess. You will also be prompted to install the ScreenToaster Java applet, which you must accept.
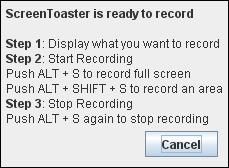
Once you have clicked on “Start Recording,” ScreenToaster will display a small info box which explains how the software works. It is rediculously easy to understand and use. First, you must bring forward the application which you would like to record. Then, pressing “ALT + S” begins a recording of your entire screen, whereas “ALT + SHIFT + S” allows you to select an area of your screen to record. Finally, once you are done recording, “ALT + S” must be pressed again in order to publish the video.
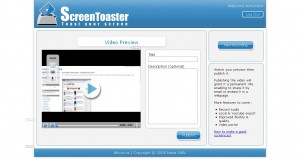
Once you have finished recording (after pressing ALT – S), you will be taken back to the ScreenToaster control panel where you’ll be able to see your recording.
Using the three options on the left side of the video preview, you can add subtitles, audio, or change the preview shot of the video.
You must now name and describe your video. When you are done, click on “Publish”
Unfortunately, we at ScreenCaptureNews were unable to publish any videos due to the fact that it gave us an error every time that we hit “Publish”. The developers of the software wrote to us and said that, because the software is still in beta, bugs do pop up from time to time.
What we saw in the preview, however, was fairly decent. The frame rate was pretty good and it even recorded a video off of YouTube at about 20fps, which is a ten-fold difference between ScreenCast-O-Matic. ScreenToaster was also exceptionally easy to use and overall is a promising web applet.
The developers of ScreenToaster claim that the application works with Windows, Mac OS X, and Linux. ScreenToaster will always be free and will most likely be ad-supported once it is released to the general public. Tentative release date, according to ScreenToaster staff, is “end of October”. We’ll keep you posted with a full review once ScreenToaster is out of beta.
Mini DVI, what it is and how to capture it
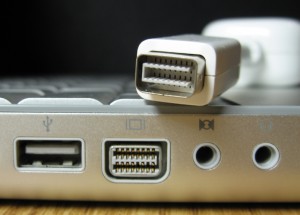
Mini DVI is a common connector found on Apple’s Macbook, Macbook Pro and Intel-based Powerbook G4 laptops that have been produced prior October 2008. A Mini DVI port can also be found on Apple’s Intel-based 1U XServe servers.
According to Apple, the creator and sole manufacturer of computers with Mini DVI ports, Mini DVI, like Mini VGA, was implemented to save space and allow for the production of smaller laptops. This, however has been disproven by other manufacturers like Dell or Toshiba which have all made notebook computers with similar sizes, form factors, and specifications to Apple’s, yet have been able to implement a full-size DVI port. The relatively steep price of the adapters manufactured by Apple to work with the Mini DVI port (over $50 for some models) hint at the real (financial) motives behind Apple’s decision to equip its computers with Mini DVI ports.
While the way that the port is named suggests that Mini DVI is just a miniature version of the full-size DVI port, the Mini DVI port actually carries three different signals:
- Single-link DVI (Digital)
- VGA (Analog)
- TV (Analog)
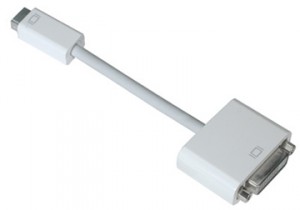
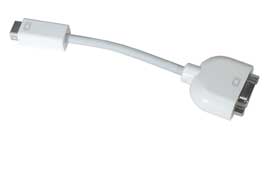
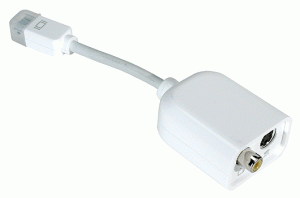
In order to convert the Mini DVI signal to any of the three signals mentioned above, a special adapter is required for each application.
1. Mini DVI to DVI (Single Link)
2. Mini DVI to VGA
3. Mini DVI to Video (TV RCA + S-Video)
A Mini DVI to HDMI adapter is also available on the market, but, unlike the three adapters shown above, is not manufactured by Apple.
Capturing Video from the Mini DVI Port
Since the Mini DVI port can be easily converted to DVI, VGA, or TV-out using adapters manufactured by Apple, a Mini DVI signal can be captured using a DVI or VGA frame grabber or a video capture card for TV/S-Video signals. Note that, since the DVI signal is single link, Mini DVI does not support resolutions higher than 1920×1200 @ 60Hz.
Please refer to our Frame Grabber Comparison Table to evaluate possible alternatives for VGA and DVI frame grabbers.
Technical Information and Specifications
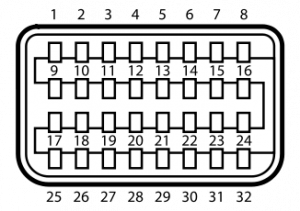
For advanced users doing custom product development based on Mini DVI, below is a pinout of the Mini DVI port. Source.
| Pin 1 | Dat2_P | Data 2 + |
| Pin 2 | Dat2_N | Data 2 - |
| Pin 3 | Dat1_P | Data 1 + |
| Pin 4 | Dat1_N | Data 1 - |
| Pin 5 | Dat0_P | Data 0 + |
| Pin 6 | Dat0_N | Data 0 - |
| Pin 7 | CLK_P | Clock + |
| Pin 8 | CLK_N | Clock - |
| Pin 9 | DGND | |
| Pin 10 | DGND | |
| Pin 11 | DGND | |
| Pin 12 | DGND | |
| Pin 13 | DGND | |
| Pin 14 | DGND | |
| Pin 15 | DGND | |
| Pin 16 | DGND | |
| Pin 17 | +5 V | |
| Pin 18 | DCC_DAT | |
| Pin 19 | spare | |
| Pin 20 | BLUE | Analogue blue |
| Pin 21 | not installed | |
| Pin 22 | GREEN | Analogue green |
| Pin 23 | not installed | |
| Pin 24 | RED | Analogue red |
| Pin 25 | Detect | |
| Pin 26 | DCC_CLK | |
| Pin 27 | spare | |
| Pin 28 | DGND | |
| Pin 29 | HSYNC | Horizontal sync |
| Pin 30 | DGND | |
| Pin 31 | VSYNC | Vertical sync |
| Pin 32 | DGND |
A Brilliant Way to Quote
October 15, 2008 by Victor · Leave a Comment
How often have you wanted to quickly grab a screenshot of a webpage and post it online, publish it to a forum, e-mail it to your friends, or just save it to your computer? Of course, all these tasks are easily accomplished by complicated programs or browser add-ons, but what if you could do all that without ever actually installing anything?
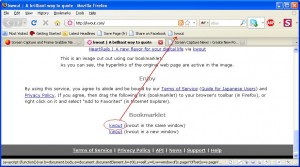
This is where Kwout (pronounced like “quote”) comes in. Kwout is what is called a bookmarklet and is launched simply by adding the link provided to your bookmarks and then launching the bookmark. For convenient use, you can drag the link directly onto your toolbar, as shown below.
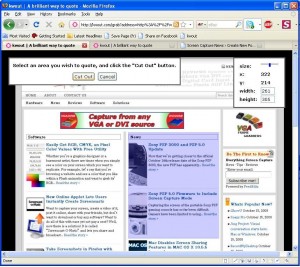
That’s it! You can now take screenshots of webpages, images on webpages, and even save text with links by going to the bookmark that you just added. When you see something on a website that you would like to save, simply click on the bookmark and follow the easy to use proccess. First, you will have to select the area of the webpage that you want to capture and click on “Cut Out”.
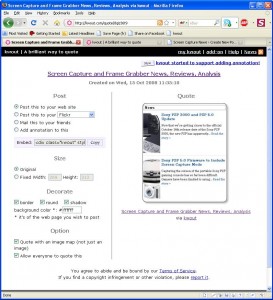
You will now be shown your captured area. At this point, you can customize the way it looks, add annotations, and select where to post it. You can copy/paste the HTML code given to put it directly on your site or blog, you can e-mail it to your friends, or post it to one of these photo-sharing and content sharing sites:
- Flickr
- Tumblr
- Blogger
- Vox
- sa.yona.la
- Livedoor Blog
- Ameba Blog
- Hatena Diary
- Excite Blog
- Cocolog
- So-net Blog
That’s it! You have now posted an exceprt/screenshot from another webpage! Keep this tool in your bookmarks, it’s easy to use and absolutely free. You never know when it could come in handy.
Source: http://www.kwout.com/
Sony PSP 3000 and PSP 5.0 Update
October 8, 2008 by Victor · 11 Comments
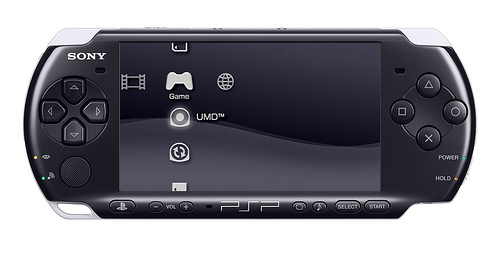
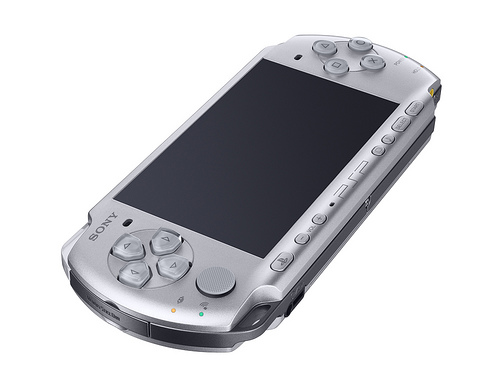
Now that we’re getting closer to the official October 14th release date of the Sony PSP 3000, the new PSP has apparently been popping up all over Best Buy stores in the US. Here is a picture of the new PSP 3000, packed with the Ratchet and Clank: Size Matters bundle.
If you’re lucky enough to convince the sales rep to sell it to you (they aren’t supposed to sell them before the 14th, but some do anyways), then you will find, besides the actual console, game, cables, instruction manuals, a 1GB memory card. It is surprising that Sony didn’t include a 4GB card, but it seems like they’ll be selling the PSPs with 4GB memory sticks once the 1GB cards run out.
Sony PSP 5.0 Firmware Update
The new Sony PSP 5.0 firmware update will include the following features:
- PSN (PlayStation Network) Access. This means that gamers will now be able to use the PSP for multiplayer online games. Most new releases will now have full multiplayer support, with possible access to the PlayStation Store. Users will also be able to chat with eachother directly through their PSPs.
- RSS Reader. While there is an RSS reader in the current release of the firmware, it is quite buggy and is not easy to use. The new RSS reader will be completely redesigned to address all of the features which Sony has received complaints about. The new RSS reader, besides having support for images and videos, will also have support for text.
- Screenshot mode. Users will now be able to take screenshots of their in-game action, which was something impossible with the previous firmware revisions. The screen captures will then be saved to the Memory Stick. Most likely, full support for screen captures will only be available in newly released games.
PSP 3000 Hardware
So you now know about the new firmware. Now, let’s see what’s new on the hardware side of the PSP 3000, and is it really much better than the PSP 2000?
The new PSP has a more refined look than the PSP-2000. Sony has also done a lot of research in the ergonomics of the device, which have also been improved. Some of the ports on the PSP have been moved around to provide easier and better connectivity. The TV-out feature has also been improved to support TVs without progressive scan, whereas only progressive scan TVs were able to function with previous hardware version of the PSP.
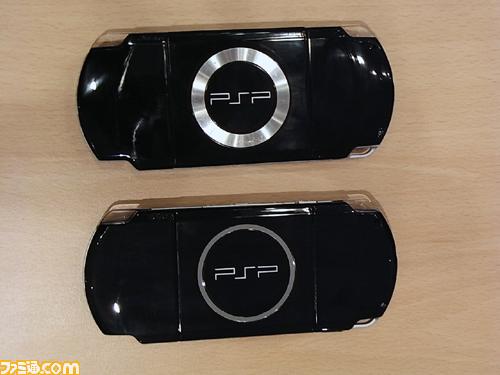
Sony has also decided to add an integrated microphone to the PSP 3000, located just below the LCD screen. This feature would be very welcomed by those who use Skype on the PSP. It would even allow future games to support in-game voice chat (similar to TeamSpeak on PC). The rear (back) panel has also been refined for a different look, pictured below.
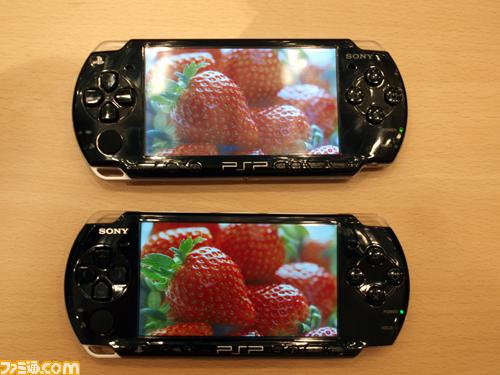
The biggest hardware improvement, however, is the new LCD screen. This really is a feature worth switching to the PSP 3000 for. This screen is probably the crispest and brightest of any portable video game console available on the market. The PSP 2000 is pictured above, while the PSP 3000 is at the bottom of the picture. Check it out:
For those users who absolutely need to know the specs of the new PSP 3000, Sony has announced the official specifications, shown below.
Sony PSP 3000 (PlayStation Portable) Specifications
Size: 169.4 x 18.6 71.4 mm / 6¾ x ¾ x 2¾ in
Weight: 189g / 6.7oz (with the installed battery)
CPU: System clock frequency 1-333MHz
Main Memory: 64MB
Display: 4.3 inches (16:9) full-transparent type, 480×272 pixel, 16,770,000 colors
Sound: Built-in stereo speakers
Main input/output: Wireless LAN (IEEE 802.11b) (Wi-Fi)
High Speed USB (USB2.0) (mini-B)
Memory Stick PRO Duo™
Analog Video Out
Microphone
Main connectors: DC IN 5V connector; DC OUT connector; Video out/headset connector; USB connector
Memory Stick Duo™ slot
Power sources: Lithium-Ion rechargeable battery pack
AC adaptor
USB power supply
Internal disc drive: Read-only UMD™ drive
Access control: Region code, parental control
Ad hoc mode (connects up to 16 consoles)
Supplied accessories: AC adaptor
Battery pack (1200mAh)
The verdict? Two thumbs up from us! Sony really did listen to gamers’ views on the old PSP and has added some cool and, more importantly, useful features to make the PSP experience even better than before! If you’re still considering buying a PSP, then the PSP 3000 is the one to get!
More links/sources: Sony Official Press Release, QJ.net, Walyou.
Your Complete Guide to VGA and VGA Capture
Whether your application involves creating IT instructional manuals, recording from high resolution security systems, sharing a presentation with people from around the world, or printing handouts directly from any computer screen, you are looking at VGA video capture or VGA signal capture as a mean to achieving these goals. This article will explain in-depth how VGA signal capture works and what you need to know in order to capture such a signal.
The VGA Plug
Unlike DVI or HDMI, which are both digital standards, a VGA signal is purely analog. The differences between VGA, DVI, and HDMI are described in detail in this article.
“VGA” is short for Video Graphics Array and has been the most common connector/plug for analog video on computer equipment and various electronics with an analog video output since the introduction of personal computers (PCs). VGA carries a RGB (red-green-blue) signal and is sometimes referred to as “D-Sub” due to its’ 15-pin “subminiature” connector. The term “VGA” also refers to the VGA standard graphics resolution – 640×480 pixels.
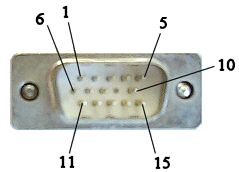
A detailed VGA pinout is shown below to help advanced users understand how VGA works. Source.
VGA Video Connector Pinout
| Pin # | Signal Name |
|---|---|
| 1 | Red |
| 2 | Green |
| 3 | Blue |
| 4 | No Connect |
| 5 | Ground |
| 6 | Ground |
| 7 | Ground |
| 8 | Ground |
| 9 | No Connect |
| 10 | Ground |
| 11 | No Connect |
| 12 | DDC DAT |
| 13 | Horizontal Synchronization |
| 14 | Vertical Synchronization |
| 15 | DDC Clock |
VGA Frame Grabbers and How They Work
The only true way to capture and record a VGA signal is through a VGA-compatible frame grabber. A VGA frame grabber can be defined as a device that proccesses analog VGA signals and converts them into digital signals readable by computer equipment. While frame grabbers are described in slightly higher detain in this Wikipedia article, these three main internal components determine a VGA frame grabber’s performance:
- ADC (analog-to-digital) converter. This is the circuit that transforms the analog signal coming from the source VGA signal into a digital stream that can be read by the target computer.
- RAM (random-access memory). Also referred to as buffer memory, this memory is vital in storing the captured image for a short period of time on board the actual frame grabber.
- FPGA (field-programmable gate array). This is the heart of the frame grabber and is analogous to a processor inside a PC. It is a part that is entirely programmed by the manufacturer of the frame grabber.
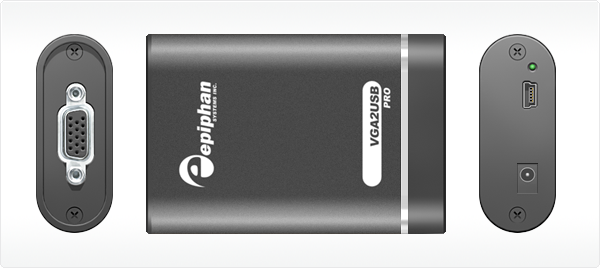
Some frame grabbers, like the PixelSmart VGA Master have no on-board RAM buffer memory. This fact alone, besides leading to a lower-quality image, lowers the maximum possible capture rate (also referred to as frame rate) achievable by the frame grabber. Frame grabbers without on-board RAM are sufficient for the capture of presentations with lots of static slides or any other static imagery, like capturing screenshots from the computer’s BIOS. On the other hand, if you are capturing a high-resolution image and/or are capturing from a source with a high frame rate, like a video game console (ie XBOX 360) or medical equipment (ie: ultrasound), a frame grabber with at least 16MB RAM would be preferred. The VGA2USB Pro by Epiphan Systems, for example, has 32MB RAM memory and is able to capture at a whopping 60 frames per second in some resolutions.
PixelSmart’s Internal PCI VGA-Master
Epiphan Systems’ external USB-based VGA2USB Pro frame grabber
While RAM is important in defining the characteristics of a frame grabber and the quality of the image it outputs, another important factor is the way that the FPGA, or processor, is programmed. You will notice that the higher-end frame grabbers, like the VGA2USB Pro pictured above, have built-in features that some of the more basic frame grabbers, like the PixelSmart, do not have. A quick look at the Epiphan Systems webpage reveals the following features programmed via the FPGA processor: On-board cropping, Color space conversion, USB Transfer Accelerator™, Compression Booster Filters™. All of these software/firmware features allow the frame grabber to achieve extremely high quality and transfer rates without increasing the frame grabber’s size.
Please refer to our complete Frame Grabber Specifications Comparison Table for detailed and complete specifications on every VGA frame grabber on the market.
Applications for Frame Grabbers
Frame Grabbers, while being a niche product, have many practical uses in today’s IT-oriented business environment. The five most common and prominent uses are described in detail in our Top 5 Uses for High Resolution Frame Grabbers You Should Know About article. From the gaming industry to the military, frame grabbers are used accross many fields related to computer technology. To give you a general idea, some industry-specific uses for high resolution VGA frame grabbers are described below.
Computer Console Gaming
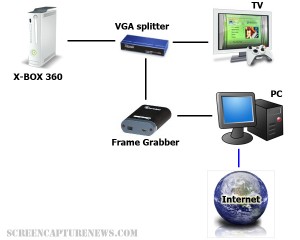
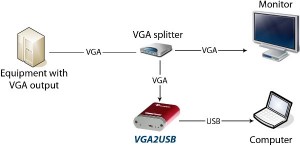
Microsoft’s X-BOX 360 gaming console has the ability to output its images via VGA or DVI. This means that a VGA frame grabber can be used to capture and record the gameplay from this game console, and even broadcast the gameplay live over the internet for other viewers to see.
The diagram above explains how to connect an X-BOX 360 to a frame grabber for recording and broadcasting the gameplay. The X-BOX’s VGA cable is connected to a VGA splitter’s input, from which one VGA output goes to the TV, and the other to the frame grabber-equipped computer. The image can then be broadcasted to the internet using the computer.
Presentation, Conference Broadcasting and Recording
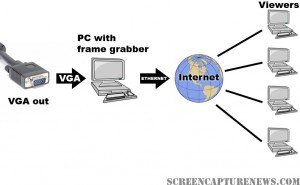
In today’s globalized business world, businesses often have partners in many different countries. When conducting an online meeting or presentation, the presenter often has the need to share his screen with viewers around the world. For this exact reason, VGA frame grabbers are useful. They allow the presenter to not only share an image from a projector, but also from a BIOS screen, an ATM machine, a RADAR device, a medical ultrasound device, a security system, or even an electronic microscope. Most of these VGA sources are not able to be broadcasted in real-time with the use of traditional software sources, and frame grabbers are the only way to properly create diagnostic-quality images and videos from these devices.
In the diagram above, the VGA source is connected directly to a frame grabber-equipped PC with access to the internet. Using any web broadcasting software, the user is able to relay the images and video captured by the frame grabber to his or her audience.
Security System Surveillance Recording and Broadcasting
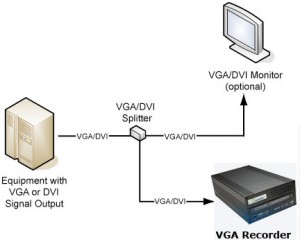
Today’s security systems and cameras are able to support digital formats as well as high resolutions required for complex security solutions. Of course, as solution is needed to record the outputs from the security system, store it in a digital format, and provide access to the files from remote locations. All of this can be accomplished with VGA frame grabber-based technology, such as the VGA Recorder, which have ample space for recording video files (up to 500GB), are able to directly transmit recordings to a remote FTP location, and give access to the recorded files through a web interface.
The diagram above, borrowed from the Epiphan Systems website, shows how easy it is to hook up a security system’s VGA output to the VGA Recorder. Everything can be set up in minutes, and the VGA Recorder is able to archive hundreds of hours of digital compressed video data to its internal hard drive.
Telemedicine and Remote Guidance
Telemedicine, also known as Remote Guidance, is an expanding field in which doctors are able to, through the internet, diagnose patients and provide advice. Telemedicine has many practical applications but some of the more notable ones are the delivery of expertise to areas in which it is not practical to have a qualified doctor at all times. For example, lets suppose that a player on a sports team gets a knee injury. Through telemedicine, the coach can use a portable ultrasound device like the Logiq Book XP and, with the aid of a frame grabber, relay the images from the Logiq Book directly to a qualified radiologist who can then make a decision on the severety of the injury.
The diagram above shows how any equipment with a VGA output, such as the ultrasound device, can be connected to a frame grabber, and the a computer. The images are then relayed to the qualified radiologist or doctor through the internet or a satellite uplink. If you would like to find out more about the field of remote guidance, then this website is a good start.
Summary
The VGA signal is the most common format used on today’s electronics and computer-based equipment. When this equipment is coupled with a VGA frame grabber, the possibilities are endless. Using a frame grabber, which is a relatively inexpensive device, organizations can not only significantly cut costs, but can also improve their productivity.
Easily Get RGB, CMYK, an Pixel Color Values With Free Utility
October 1, 2008 by Victor · Leave a Comment
Whether you’re a graphics designer or a basement artist, there are times when you simply see a color on your screen which you want to replicate. For example, let’s say that you’re browsing a website and see a color that you like within a Flash animation and want to grab its’ RGB values so that you can use that color in your own work. Of course, there is always the classic solution of capturing your screen to a file, then extracting the color via PhotoShop.
There is, however, and easier and faster way. A small free utility called Pixel Pick, weighing it an under 400KB in size, lets you see the RGB, HEX, CMYK, HSB, and Pixel values of the exact pixel under the tip of your cursor.
Pixel Pick does not need to be installed on the computer it is being used on. Just run the .EXE file and the program fires up instantly. This makes this program especially useful if you are on a public computer and absolutely need to know the color values for something that you see on your screen. The program even features a handy magnification function (pictured below) that lets you zoom in on any area of your screen by up to 30X.
What’s more, Pixel Pick saves your recent viewed colors in a handy panel (accessible by clicking the icon to the right of the magnifying glass) so that you can later access the colors which you were viewing.
You can download Pixel Pick from the publisher’s website here.
Sony PSP 5.0 Firmware to Include Screen Capture Mode
October 1, 2008 by Victor · Leave a Comment
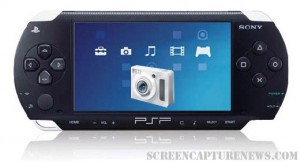
Capturing the screen of the portable Sony PSP gaming console has so far been difficult. Gamers have been limited to using the TV-out on their PSPs (PSP-2000 model only) and then using a TV capture card on a capturing PC. All this is supposed to change with the upcoming release of the next Sony PSP model, PSP-3000. Besides releasing the new device, rumors are that Sony will also offer the 5.0 version of the PSP firmware, which will include things such as direct access to the PlayStation store, better RSS feed integration, and, of course, in-game screen capture.
So, if you want to be able to capture your pocket PSP action but haven’t been able to do so, hold on to your hat. The 5.0 firmware will most likely be released alongside the PSP-3000 model on October 14th in the US and October 19th in Europe.
Source: PocketGamer
New Online Applet Lets Users Instantly Create Screencasts
Want to capture your screen, create a video of it, post it online, share with your friends, but don’t want to download or buy any software? Want to do all of this with ease yet not pay a cent? Well, now there is a solution! It is called “Screencast-O-Matic” and lets you share and broadcast a recording of your screen for free. This solution is Java-based (requires Java 1.5 installed) and works flawlessly with Internet Explorer, Firefox, and Opera on both Windows and Mac OS. Screencast-O-Matic is also supposed to work with Linux, but it seems like the developers are still working out the final kinks.
Screencast-O-Matic can post screen captures up to 15 minutes in length on their free hosting but it also lets you save the captures as .MOV QuickTime files so you can do whatever you want with your captured content.
Unfortunately, Screencast-O-Matic has some major limitations that make the applet unappealing to some. First of all, it can only capture a maximum resolution of 1024×768 and maintain a capture rate of only 2 frames per second. This is ok for text, but not good if you want to show videos or animations in your screencast. What’s more, Screencast-O-Matic does not have support for dual-monitor systems (it can only capture from your primary monitor). Click here for a sample screencast that we created with Screencast-O-Matic to see for yourself.
Using Screencast-O-Matic
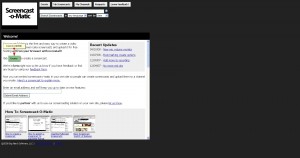
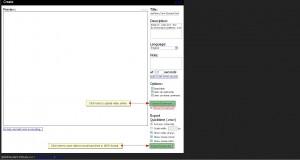
Step 1: Visit http://www.screencast-o-matic.com/ and click on “Create”.
Step 2: You will be prompted to start the Java applet. Click on “Start” at the bottom of the page. A security verification might come up, which you must also allow in order for the applet to start.
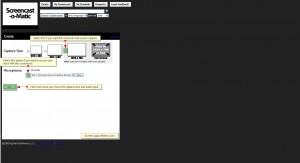
Step 3: Once you have allowed the applet access to your computer, you will now see a configuration screen. Unfortunately, Screencast-O-Matic only supports resolutions up to 1024×768, so you must select that option for maximum quality. Screencast-O-Matic also lets you add voice to the video. Once you have configured the options, click on “Go!”
Step 4: At this point, you will see a black frame come up on your screen. It cannot be resized. Drag it over the area which you would like to capture and follow the instructions supplied by Screencast-O-Matic:
- Drag the black frame so it surrounds the area of the screen that you’d like to capture.
- If you are recording audio, make sure the mic level is ok by talking into your mic and watching the
 icon. You may also need to adjust the mic recording volume for your operating system. See examples for Windows XP and Mac OS X.
 - Click the
 button to start recording the part of your screen inside the black frame (and audio from the mic you chose).
 - Click the
 button when you are done (or if you need to pause click
  button).
If you are working on a dual-screen setup, Screencast-O-Matic won’t allow you to capture from your secondary screen.
Step 5: Once you have completed yor capture, you will be able to either upload the video right away or save it on your computer as an .MOV file. If you are uploading your screencast, Screencast-O-Matic will prompt you to register a username and passoword on their website. Screencast-O-Matic will then give you a URL for your upload.
Step 6: You’re done! Now you can share the link that was given to you previously and have people access your screencast. Here is a sample screen capture that we did in-house: http://www.screencast-o-matic.com/watch/cjQvQrnnV
Take Screenshots in Firefox with New Add-on
September 30, 2008 by Victor · Leave a Comment
Have you ever wanted to quickly capture a webpage that you are visiting and save the screenshot or send it in an e-mail? What if you need to share your screenshot online with many users (for example, on an online forum)? Maybe you want to create instructions to show users how to navigate a web page and do not want to spend a fortune on special screen capturing and annotating software like Camtasia. If you answered “yes” to any of the previous questions, then this free add-on to Firefox should be something to be looking into.
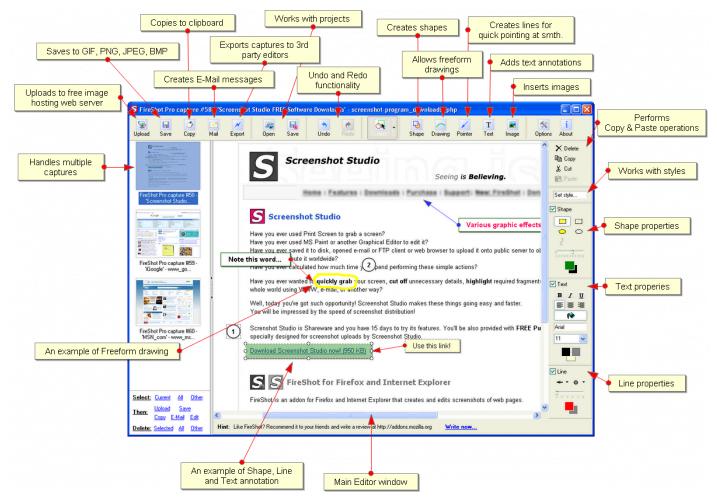
The FireShot Add-On for FireFox is 100% free and is compatible with Firefox 2 and Firefox 3. It adds the following functionality to your Firefox browser:
- Instantly upload screen captures to FREE public screenshot hosting
– save screenshots to disk (PNG, GIF, JPEG, BMP)
– print screenshot
– copied to clipboard (similar to PrintScreen button)
– Attach screenshot to e-mail
– Annotate and add text and instructions to screenshot
The image above describes the features of the FireShot add-on screen capture editing and annotation tool. As you can see, the add-on has a good array of features and should be sufficient for any sort of simple editing and annotating.
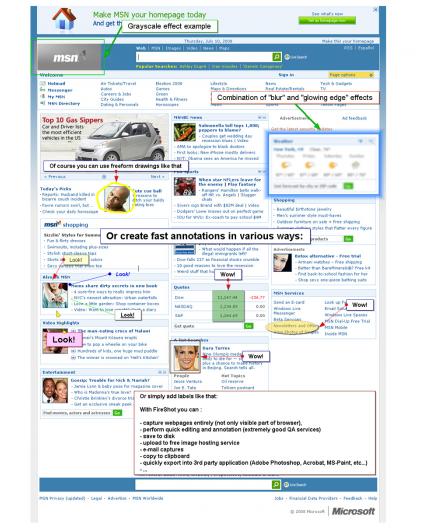
What’s more, FireShot has the ability to add effects to the captured screenshots. This is especially useful if you would like to emphasize a particular section of a webpage or want to hide part of the webpage from the screenshot (if there is a user name or revealed password, for example).
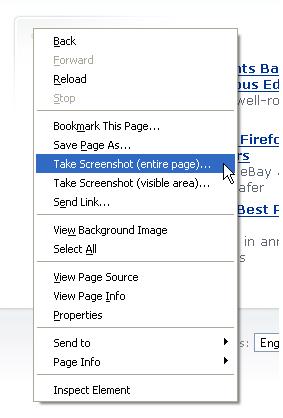
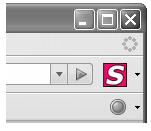
FireShot is accessible both by right-clicking on the webpage that you are browsing or by clicking on the “S” icon beside the address bar.
FireShot can be downloaded here. This add-on is recommended for anyone that regularly needs to take screenshots from their browser or for those that need to create instructional manuals related to the online world.
Mac Disables Screen Sharing Features in MAC OS X 10.5.5 Leopard
September 29, 2008 by Victor · Leave a Comment
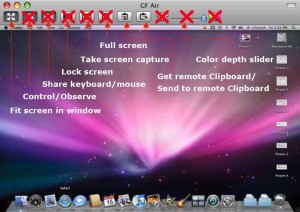
With the release of Mac OS 10.5.5 Leopard in mid-september, many users have noticed that some of the screen sharing features that were present in the previous Leopard are now missing, with no option to bring them back. The following features are now disabled: quality/color depth setting, screen capture, control/observe toggle, full screen mode, and keyboard/mouse control toggle.
If the Screen Sharing application was vital to you and those features were important, there are several options. First, the 10.5.4 version of the Screen Sharing application can be installed. The buttons can also be restored to the 10.5.5 version by using a special program called XCode, described in this Macword article.
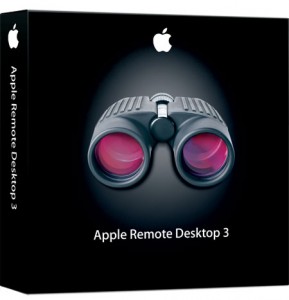
Finally, Mac offers to reinstate these features by purchasing a $300 5-user license for Apple Remote Desktop.


