Apple iPhone Takes Screenshots Without User Consent
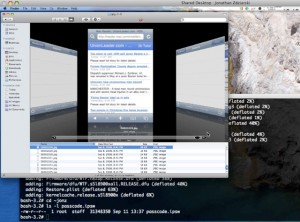
 Security experts say they have found a hole in Apple iPhone which automatically takes a screenshot every time that you press the “Home” button, and that the images made can be retreived later. Of course, these screenshots are taken without the user’s consent and knowledge. This “feature” is not to be confused with the iPhone’s actual screenshot feature, which archives an image of the screen to the iPhone’s memory whenever you hold down the power/sleep button and push the Home button.
Apparently, the iPhone takes a screenshot every time you press the Home button in order to create the shirinking effect of the application window that was open when the button was pressed, bringing some insight into the way that the iPhone OS works. The iPhone is supposed to remove the screen capture file after the effect has been created. Nevertheless, the screenshots can be retrieved with special software that can analyze the memory of the iPhone for deleted files.
Jonathan Zdziarski, the security expert that discovered the flaw, said that this hole has been used by forensic experts to “gather evidence against criminals convicted of rape, murder or drug deals.”
While most people have nothing to worry about, this issue raises a privacy concern for those that do things on their iPhone that they wouldn’t want others to discover should the phone end up in the wrong person’s hands.
Screenshots, like the one above, are captured by the iPhone every time that the “Home” button is pressed by the user.
Read original article here: source.
New Software Beats Screen Capture Viruses and Malware
September 22, 2008 by Victor · Leave a Comment
 Have you ever had your bank account information stolen by a virus or trojan that is on your computer? Many people have, and a coalition of German companies that includes Global IP Telecommunications, CyProtect AG and PMC Ciphers, say they have developed a means of encrypting keyboard input before keylogging or screen-capture malware has a chance to record it.
Modern screen capture malware or viruses function by taking a screenshot of your bank account screen or screenshots of other sensitive websites. Pair that with a keylogger that saves your every keystroke, and thiefs can have easy access to your personal information.
The new anti-keylogger and screen capture technology works by rendering password recording or screen capture impossible. It does so by presenting a virtual password entry screen on which letters and numbers are drawn figures, not ASCII characters, and the drawing is deleted several times per second during input. While this does make the password screens on your computer a bit “flickery,” it rules out any possibility of a screen capture that can compromise your personal details.
Read the full article at SC Magazine.
Security Scanner Monitoring and Recording… Made Easy!
September 22, 2008 by Victor · Leave a Comment
Remember the last time you were at the airport? The worst part is going through security and getting your carry-on baggage scanned, then re-scanned, and even possibly checked! This is because, many times, it’s hard for one person monitoring the baggage scanner to be sure that there is nothing suspicious with the luggage in question. Wouldn’t it be better, and safer, if everything was being double-checked by somebody out of sight?
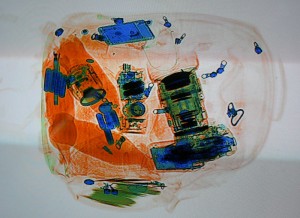
These scanner devices use X-Ray technology, similar to that used in medical applications, to “see through” your bag. The link between the actual security scanner and the monitor that is being used to display the images is, of course, a VGA or DVI signal.
A simple analog video link between the baggage scanner and a monitor placed away from the scanner would not yield enough resolution or quality for proper analysis of the video. A high resolution solution must be implemented in order to transmit a diagnostic quality image, like the one originating from the VGA scanner, to a remote location like a control room.
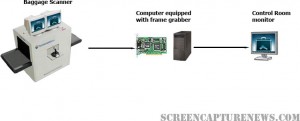
This is where frame grabbers become useful. Using a computer equipped with a frame grabber or a dedicated VGA recording/broadcasting device, the signal can be transmitted in real-time to a control room where someone would be able to review the baggage being scanned. What’s more, if the VGA or DVI signal from the X-Ray Scanner is being recorded, the data can be saved and reviewed, meaning that suspicious luggage can still be checked before the passenger boards his or her flight.
The diagram above shows how a frame grabber-equpped PC can be used to relay the images from the airport X-Ray baggage scanner to a separate monitor in a control room. While the signal between the frame grabber and baggage scanner is VGA or DVI, the link between the computer which is being used to grab the VGA signal and the computer used to output to the control room monitor can be an internet or local network (LAN) link. The computer equipped with the frame grabber can also be used to record and archive all data coming from the scanner.
More common uses of frame grabbers, all of which can be used in this scenario, are described in our “Top 5 Uses for High Resolution Frame Grabbers” article.
IOGear to Launch Wireless USB to VGA Device
September 15, 2008 by Victor · Leave a Comment
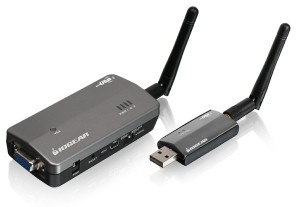
This month, IOGear is releasing its Wireless USB to VGA adapter at a price of $299.95. This device works by plugging the USB dongle into the source device where it gets recognized as a video adapter and connecting the VGA dongle to the target monitor or projector.
You will still need to power the VGA dongle, and the USB adapter is only compatible with Windows XP or Vista. According to IOGear, the “USB to VGA Wireless Kit” has a working range of 30 feet (just over 9 meters) and is compatible with resolutions up to 720p. In other words, if you have a VGA source with a maximum resolution of 1280×720 and cannot run wires to your monitor or TV, the IOGear device would be something to look into.
There has been no word from the manufacturer in terms of video lag or supported frame rates, but we should see more details as these things start selling online and in retail outlets throughout North America.
DVI Image and Video Capture – The Basics
Almost all computer equipment sold these days supports DVI. This can range from modern computers and projectors to game consoles like the Microsoft X-Box. Of course, this means that high end hardware solutions for DVI capture are now becoming readily available.
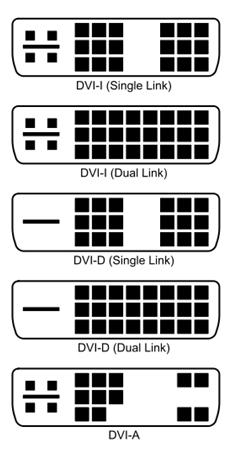
The first thing that you must determine is whether your DVI signal is a true digital video signal or a traditional analog source. The easiest way to tell if a digital or analog signal is running through your DVI port is to look at he connector that you are using and match it with the diagram of the DVI connector below.
If either your DVI plug or connector are DVI-D (DVI-Digital), this means that a 100% digital signal is being used. For this kind of signal, you absolutely need to use a DVI frame grabber.
If the connector or plug is of the DVI-A (DVI-Analog) flavor, then you’d be able to use a DVI to VGA adapter and a VGA frame grabber. DVI-A supports analog signals only is and is identical to VGA but with a different pin placement.
If the plug is DVI-I (DVI-Integrated), this means that it is capable of running both an analog and digital signal along the cable. Thus, unless you know if the signal is analog or digital, you would need a DVI-capable frame grabber to capture the signal.
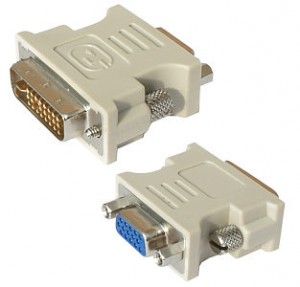
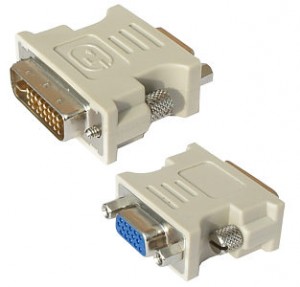
As stated earlier, a VGA frame grabber would do the job for DVI-A and analog-only DVI-I signals. Before a VGA grabber can be used, the DVI signal needs to be converted to a VGA one using a DVI-to-VGA adapter, which costs roughly $10 (pictured below).
You can now follow the same procedure as you would when recording a VGA signal with your VGA frame grabber.
Digital Signals (DVI-D and DVI-I)
If you have determined that you have a digital DVI signal that needs to be captured, a DVI-specific frame grabber must be used. Before choosing a suitable frame grabber, you must determine if the DVI signal is single link or dual link.
A single link DVI signal can support, at a refresh rate of 60 Hz, a maximum resolution of 1915 x 1436. If your DVI cable supports a higher resolution at a refresh rate of 60 Hz, then you are running a dual link signal. Dual link DVI is used primarily on large LCD monitors, such as the Apple monitor or the 25″+ Dell monitors.
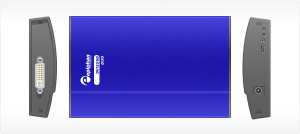
If you need to capture a dual link DVI signal, then your choice of frame grabber is limited to one model, the Epiphan Systems DVI2USB Duo (pictured below), which captures single and dual link digital DVI signals only.
Unfortunately, the DVI2USB Duo is a very specific high-end frame grabber that does not have the ability to capture an analog or VGA video signal. However, the DVI2USB Duo is a blessing for those with dual link DVI capture requirements. You can see how the DVI2USB Duo stacks up against its competition in this table.
If, however, you need to capture a single link DVI signal, then your choices are much greater. If you are looking for a PCI-based card, then you have a choice of the EMS Imaging Xtreme RGB, NCast DCC 3.1 or the Unigraf UFG-03. If you are into external USB-based solutions, then Epiphan Systems offers the DVI2USB, which is an external dual-mode VGA and DVI frame grabber or the DVI2USB Solo, which can capture a single link DVI signal only.
There is no one ideal frame grabber that does everything. Your choice of a DVI capturing device should depend on your needs, as outlined above. If you wish to find the specifications of each frame grabber featured in this article, then this would be a good place to start.
Top 5 Uses for High Resolution Frame Grabbers You Should Know About
September 12, 2008 by Victor · Leave a Comment
High resolution frame grabbers are devices that are used to capture the signal from a VGA or DVI stream and convert it into a readable computer format. In other words, frame grabbers take a high resolution video signal and relay it to the memory of the computer as digital data. What you do with that data, however, is entirely up to you. This article will list the top most useful applications for modern high resolution frame grabbers.
1. Archiving Images and Video
This is probably the most common use for frame grabbers today. All high resolution frame grabbers come packaged with an application that allows you to capture the VGA/DVI signal to old fashioned MPEG or AVI video as well as common JPG, BMP, or GIF images. Some applications even have support for live resizing of the captured output in order to decrease file size.
As well, if the frame grabber has WDM driver or Video4Linux support, the computer sees it as a high resolution camera, meaning that you can use any application, such as Windows Encoder, QuickTime Broadcaster, or Adobe Premiere to capture from your VGA or DVI source. Furthermore, SDKs and APIs released by manufacturers allow one to create custom applications and integrate the frame grabber into existing solutions, therefore automating the archiving proccess.
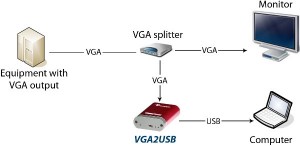
This diagram, taken from the Epiphan Systems website, shows how to use a frame grabber for recording images or video from any device with a VGA output while keeping the device’s monitor. The monitor can be omitted if the user does not need to view the output from the device.
2. Broadcasting
Broadcasting isn’t exactly the first thing that comes to mind when you are thinking of frame grabbers. It is, however, one of the top uses for high resolution frame grabbers. You may not know it, but pretty much all manufacturers that sell boxes for broadcasting a high resolution video signals have integrated frame grabbers inside their devices.
In fact, you can build an equivalent to one of these video/VGA/DVI broadcasting boxes yourself at a fraction of the cost by combining any high resolution frame grabber with a PC. As an example, this process is described in the “Broadcasting” section of our Epiphan Systems VGA2USB LR review.
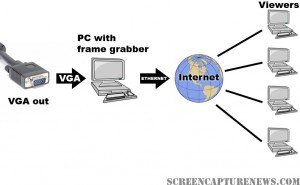
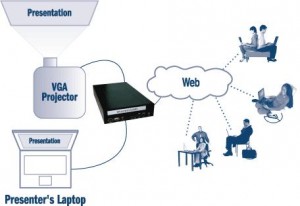
The simple diagram above explains how the broadcasting process works with a frame grabber. The VGA signal is digitized in real-time using the PC with PCI or USB frame grabber. Then, using webcast programs such as Wirecast, Windows Encoder 9, or QuickTime broadcaster, the digitized real-time video from the frame grabber is relayed over the internet to viewers worldwide.
3. Printing
This is an example of combining a technology that has been around for as long as computers existed (digital printing) with a fairly recent technology (frame grabbers). Why would you want to print to paper from the VGA or DVI output of a device? Often, a “hard copy” provides to be the most secure way of storing something.
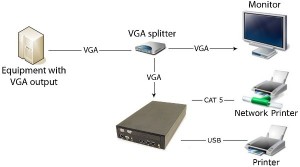
Consider a situation where you are giving a presentation and would like to produce handouts for everyone on the spot. Wouldn’t it be great if you could just press a button and the contents of your screen got printed right away? Some manufacturers provide this feature in their software, while others (primarily Epiphan Systems) go as far as separate stand-alone devices dedicated to printing from a VGA screen.
The diagram above, taken from the Epiphan Systems website, shows how a frame grabber based VGA printer is connected to the source device. The VGA printer, shown in a black enclosure, can be replaced with a PC and frame grabber combination.
4. Web Conferencing
Distance collaboration forms the basis of many partnerships in today’s complex business environment. Several characteristics define a good web conferencing solution – reliability, ease of use, effectiveness.
Pairing a frame grabber with your conferencing software of choice can give you these three characteristics and more. Solutions like WebEx allow the user to share his or her webcam. Since most frame grabbers register as a high-resolution camera in Windows and Mac OS X, the user can simply point the program to transmit images from the frame grabber instead of from a webcam. This can be extremely useful when you want to share images from an external source other than the computer being used for the web conference. This can include anything from X-Ray imagery, live ultrasound scans or live GPS info to relaying live screenshots from a server or computer.
Epiphan Systems makes the VGA2WEB, which is a one-of-a-kind web conferecing solution with the primary goal of sharing a VGA signal. If VGA signal broadcasting and conferencing is critical to your application, then this may be a product you should seriously consider.
This diagram, taken from Epiphan Systems, shows how a presentation is broadcast in real-time to viewers on the web. The setup for web conferencing is identical to the setup for broadcasting. In the case of conferencing however, the user has a medium in which he/she can give feedback to the presenter.
5. Monitoring of Critical Systems
Most of today’s IT equipment has VGA or DVI outputs, many of which need to be monitored as they are critical to the functions of the organization which they support. Traditional methods of using VNC, converting the VGA to composite video, or having a separate monitor for each output have proven to be not only costly, but also not very reliable.
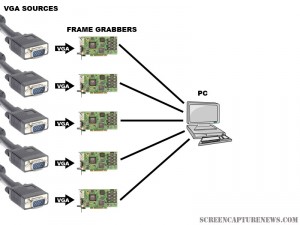
Unlike substitute solutions, high resolution frame grabbers are very scalable, meaning that many of them can be installed on one computer with one monitor output that will be used for central monitoring. Frame grabbers can also be mounted into a rackmount system and you will find that some manufacturers are ready to custom-build a rackmount frame grabber for you.
In the diagram above, several frame grabbers, each of which are connected to separate VGA sources, are attached to one computer. This computer displays the output from each VGA source on one monitor. As well, the computer can record, broadcast, or print from each of the sources in real time.
VGA, DVI, HDMI. What they are and how they differ.
September 9, 2008 by Victor · 5 Comments
VGA
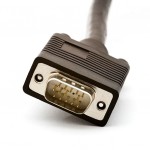
VGA stands for Video Graphics Array and is the most common connector for analog video on computer equipment and various electronics with an analog video output. VGA carries a RGB (red-green-blue) signal and is also referred to as D-Sub due to its’ 15-pin connector. The term “VGA” also refers to the VGA strandard graphics resolution – 640×480 pixels. The VGA connector, unlike DVI or HDMI does not carry a digital video signal.
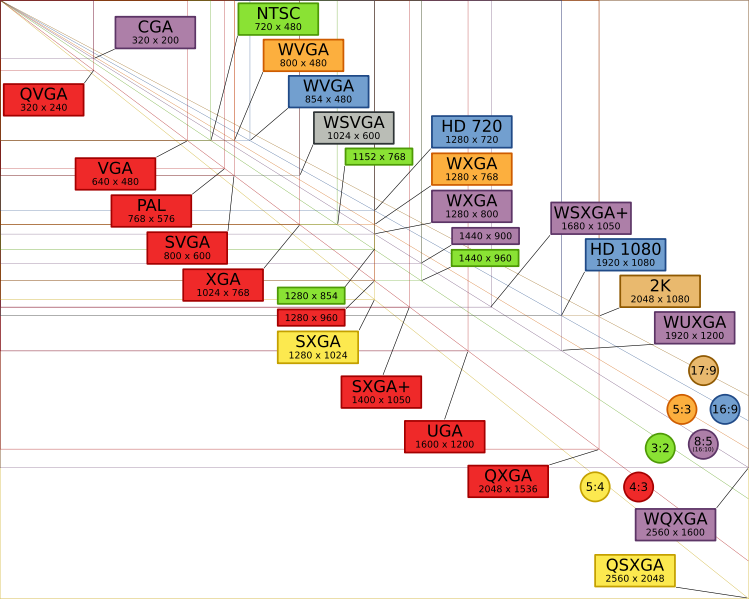
The following is a “VGA chart” showing the term, pixel, and aspect ratio for common resolutions. Source: Wikipedia
| Name | x (width) |
y (height) |
Pixels (×1 Million) |
Aspect Ratio |
Percentage of difference in pixels | |||||||
|---|---|---|---|---|---|---|---|---|---|---|---|---|
| VGA | SVGA | XGA | XGA+ | SXGA | SXGA+ | UXGA | QXGA | |||||
| VGA | 640 | 480 | 0.31 | 1.33 | 0% | −36% | −61% | −69% | −77% | −79% | −84% | −90% |
| SVGA | 800 | 600 | 0.48 | 1.33 | 56% | 0% | −39% | −52% | −63% | −67% | −75% | −85% |
| XGA | 1024 | 768 | 0.79 | 1.33 | 156% | 64% | 0% | −21% | −40% | −47% | −59% | −75% |
| XGA+ | 1152 | 864 | 1.00 | 1.33 | 224% | 107% | 27% | 0% | −24% | −32% | −48% | −68% |
| SXGA | 1280 | 1024 | 1.31 | 1.25 | 327% | 173% | 67% | 32% | 0% | −11% | −32% | −58% |
| SXGA+ | 1400 | 1050 | 1.47 | 1.33 | 379% | 206% | 87% | 48% | 12% | 0% | −23% | −53% |
| UXGA | 1600 | 1200 | 1.92 | 1.33 | 525% | 300% | 144% | 93% | 46% | 31% | 0% | −39% |
| QXGA | 2048 | 1536 | 3.15 | 1.33 | 924% | 555% | 300% | 216% | 140% | 114% | 64% | 0% |
DVI
DVI stands for Digital Visual Interface and is a digital video format used on most modern computer monitors. It is forward compatible with HDMI video in digital mode and fully compatible with VGA video in analog mode.
The DVI connector carries both a digital and analog video signal. It is of rectangular form and comes in a variety of flavors dependant on its pin layout.
| DVI-I (Single Link) | Integrated digital and analog signals. |
| DVI-I (Dual Link) | Integrated digital and analog signals. |
| DVI-D (Single Link) | Digital signal only. Incompatible with VGA. |
| DVI-D (Dual Link) |
Digital signal only. Incompatible with VGA. |
| DVI-A | Analog signal only. Backwards compatible with VGA. Incompatible with HDMI. |
HDMI
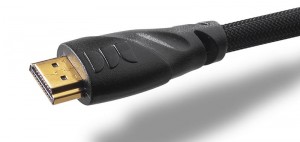
HDMI, or High-Definition Multimedia Interface, is a commonly used connector on consumer high-definition video equipment, such as plasma TVs and DVD players. HDMI carries a video and audio signal along one cable and has support for content protection. HDMI video is backward-compatible with any digital DVI signal, meaning that a DVI signal can easily be converted into HDMI and vice-versa.
Compatibility, Signal Conversion
This section will explain how to convert a VGA signal to DVI, a DVI signal to VGA, a DVI signal to HDMI, a HDMI signal to DVI, a VGA signal to HDMI, and a HDMI signal to VGA.
VGA to DVI, DVI to VGA
VGA, being an analog signal, can only be converted to an analog DVI signal. This includes DVI-A and DVI-I, with only the analog pins being used on the DVI-I connector in the conversion proccess. A simple adapter can be used to convert VGA to DVI.
DVI to HDMI, HDMI to DVI
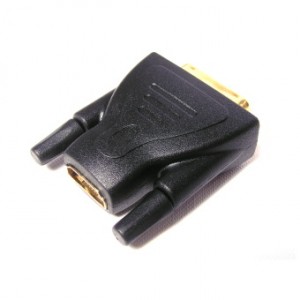
Since HDMI is essentially a digital DVI signal with an audio feed and support for content protection packaged in one cable, HDMI can easily be converted to DVI as long as no content protection is enabled on the HDMI device. Of course, when converting HDMI to DVI or vice-versa, only the video signal is carried over. An inexpensive adapter (pictured) is used to convert the signal.
VGA to HDMI, HDMI to VGA
VGA is purely an analog video signal, while HDMI is 100% digital. This alone makes both video formats incompatible with each-other. Some sort of analog to digital (ADC) or digital to analog (DAC) converter must be used in order to interface VGA with HDMI. One such product is the Atlona AT-HD500. While there are several similar products on the market to convert VGA to HDMI, all of them are costly and do not produce the same quality as a pure HDMI or VGA connection would give to the user.
If you are looking to connect your VGA video card to your HD TV via HDMI, it is suggested that you invest in a video card with direct digital DVI or HDMI interfaces, as this is the cheapest and best way to display the video from your computer on a TV.
Emulate a screen capture card on your computer… for free!
September 2, 2008 by Victor · Leave a Comment
Have you ever wanted to use your video capture software of choice for creating screen captures, broadcasting live from your screen, or creating videos? Are you a software developer that would like to integrate screen capture into your software package? If your answer to one of these questions is “yes” then we have a solution for you… for free!
The solution is to use a free tiny (<1MB) utility called VH Screen Capture Driver by Hmelyoff Labs. VH Screen Capture driver works by emulating a video capture card in your Windows system, with the output being that of your local monitor. Think of it as a software-based frame grabber that works on Windows machines only. However, do not think of this software as complete replacement to frame grabbers, as it has many major disadvantages over its’ hardware counterparts.
First of all, the screen capture driver uses up a vast amount of system resources, meaning that more advanced applications will not have good capture quality, whereas a frame grabber uses its’ own resources only and puts no extra load on the system. The VH Screen Capture Driver is also only compatible with Windows machines and, being a DirectShow filter, will not work with all applications. A frame grabber however, is compatible with any VGA or DVI output, whether it be from a MAC, Windows machine, high-resolution navigational equipment, etc. Thus, VH Screen Capture is good as a free solution but in no way can this software match all of the advantages that frame grabbers entail.
Technically, however, VH Screen Capture Driver is a DirectShow filter and is compatible with applications that use DirectShow to display content on the user’s screen. The output frame rate does depend on which application is being captured and the system load.
In short, VH Screen Capture Driver allows the user to use popular video capture and broadcast applications, such as Windows Media Encoder and Adobe Premiere, without native screen capture support to grab the image off of their screen.
Using VH Screen Capture Driver
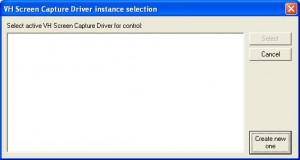
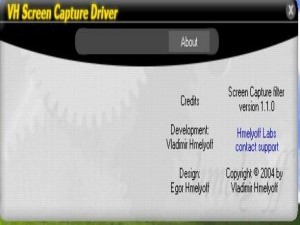
Step 1: Install the program and run it. You should immediately see the following screen. Press “create new one” to start a new instance of the capture driver.
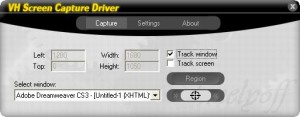
Step 2: You will now see a configuration window. Under the “Capture” tab, you may choose the “Region” option and select only a region of the screen to broadcast. Ticking the “Track window” option enables you to broadcast a single application. You may select it by choosing it from the drop-down list or by clicking on the crosshairs beside the drop-down list and then selecting the application.
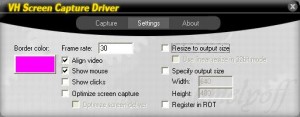
Step 3: Now select the “Settings” tab. Here you can adjust the maximum output frame rate, whether to show your cursor, or whether to compress the screen capture output. If you would like to resize your output in real time, the “Resize to output size” option must be ticked and the output size (Width/Height boxes) must be specified. This is most useful when you are broadcasting to the web and would like to limit the output video resolution in order to use less bandwidth or obtain a smaller file size.
Congratulations! The VH Screen Capture Driver is now configured. Now go to your video capture application of choice, select the “VH Screen Capture Driver” as an input, and start capturing!
Top 10 Free Screen Capture Utilities You Never Knew About
August 29, 2008 by Victor · 2 Comments
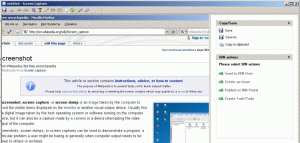
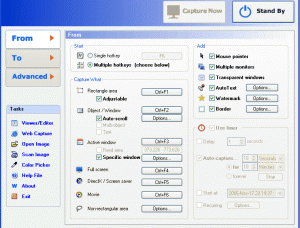
This article will outline ten of the best absolutely free screen capture programs that we find are most useful. All these applications carry their advantages and disadvantages, which are listed in this article. Should you wish to download any of the freeware programs covered in this review, please follow to the publisher’s website provided.
1. Jing Project
Description: Jing Project is a screen capture utility that takes screenshots and videos of your screen and either saves them or uploads them to ScreenCast.com. It made by TechSmith, the creators of the popular Camtasia Studio software and resembles a “lite” version of Camtasia, keeping some of the most useful freatures from Camtasia Studio 5. Read our full Jing Project review here.
Advantages: Provides free access and automatic uploads to ScreenCast.com, a YouTube like portal for sharing screen captures. Can capture entire screen, part of a screen, or a single window. Easily sends screenshots via e-mail or saves them to computer (in JPG format).
Disadvantages: Saves videos in Adobe Flash SWF format only. Screen capture video rate very slow. Lacks advanced features of Camtasia Studio.
Website: http://www.jingproject.com/
2. ScreenPrint32
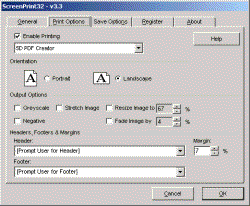
Description: ScreenCapture 32 allows you to print the full desktop, active window, predefined area, or user-selected area of the screen with a single key press. User-defined headers and footers with date and time stamps can be added to the filename. ScreenCapture32 allows you to resize the printed image, convert to grayscale or negative image, and fade or resize the image to reduce toner or ink usage. Similar to the PrintScreen function built into Windows, you can use SC32 to capture an area of the screen to your clipboard and paste it directly into your documents.
Advantages: Great for those wanting to physically print their screen captures to a printer, as software allows for good amount of customization. Allows for the user to setup the automatic capture of a series of images.
Disadvantages: Lacks any useful image editing capabilities, such as annotations. Does not allow user to capture a video of the computer screen.
Website: http://www.provtech.co.uk/software/screenprint32.asp
3. VH Screen Capture Driver
Description: The VH screen capture driver is a DirectShow filter that emulates a video card and allows the user to capture their computer’s screen activity. Using a video capture program like VirtualDub or Adobe Premiere, AVI files of your screen can be generated using codecs of your choice, such as ffdshow or Xvid. This program is for advanced users and can be used in conjuction with a video capture utility only.
Advantages: Able to capture output from any DirectShow program.The ability to use video capture software of choice or custom software.
Disadvantages: Does not work alone, requires supplemental software. Capture area buttons may be buggy and not allow user to properly configure video capture size. VH Screen Capture Driver is not well-suited for capturing still screen shots.
Website: http://www.hmelyoff.com/index.php?section=8
4. MWSnap
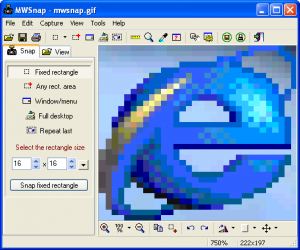
Description: MWSnap is a free screen capture utility that is able to take snapshots of your screen and save them to any image file format. MWSnap has support for autosaving and integrated tools for measuring an area of the screen as well as adding a mouse pointer to the saved screenshot.
Advantages: No need to install software to run it, making it useful when used in corporate environments or public computers. Configurable hotkeys. Small file size (just over 600KB)
Disadvantages: No video option. Does not automatically send images to e-mail client or FTP.
Website: http://www.mirekw.com/winfreeware/mwsnap.html
5. CamStudio
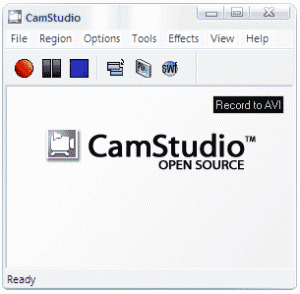
Description: CamStudio is one of the most popular utilities for creating AVI videos from a local screen capture. CamStudio also has the option of converting these videos into Adobe Flash SWF format and has support for video annotations as well as a webcam picture-in-picture option. CamStudio is free and open source and can be integrated into existing software.
Advantages: Ideal for recording training videos. Can record an area of the screen or entire screen. Ability to add annotations, voice, and webcam over video. CamStudio is able to record from Windows Media Player if the “hardware acceleration” feature is disabled.
Disadvantages: No support for taking screenshots.
Website: http://www.camstudio.org/
6. MediaChase Screen Capture
Description: MediaChase Screen Capture is a capture utility that not only lets the user take a screenshot of the entire or part of the screen, it also records videos of your screen and synchronizes them with voice coming from a microphone attached to the computer, which is ideal for creating training videos.
Advantages: Very high quality video, easy-to-use screenshot function. Has all basis features of screen recording software.
Disadvantages: Program becomes very CPU-intensive when recording video. This means that those with older computers should stay away from using this software to perform video capture of their screens.
Website: http://pmbox.ru/ScreenCaptureEn.aspx
7. ScreenHunter 5 Free
Description: ScreenHunter 5 Free is the free version of the popular ScreenHunter software. It allows the user to easily capture screenshots of the entire screen or just part of the screen. This software aso has support for mapping out key combinations to reflect shortcuts in order to activate this software.
Advantages: Consumes very little system resources. Extremely easy to use. Saves screenshots automatically with date as the file name.
Disadvantages: Very simple software with only basic screenshot functions built-in. This software is made so that the user moves on to the Pro version of ScreenHunter, which is paid software.
Website: http://www.wisdom-soft.com/sh/sh_free.htm
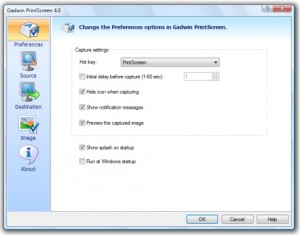
8. Gadwin PrintScreen
Description: Gadwin PrintScreen sits in the user’s system tray and integrates with the PrintScreen button on the keyboard. It extends the features of the PrintScreen button by allowing the user to save directly to JPEG or any other picture file. It also lets you choose a part of your screen to capture, print the screen capture right away using your installed printer, or attach it as an attachment to your e-mail. Gadwin PrintScreen also has an integrated resizing tool.
Advantages: Easily extends PrintScreen function. Consumes low system resources when running in the system tray.
Disadvatages:No video or annotation capabilities.
Website: http://www.gadwin.com/printscreen/
9. Debut Video Capture Software
Description: Debut Video Capture Software allows the user to create a video of the screen or capture video from a webcam with a single click. It is small in size and allows the user to configure preset video durations to record for. Debut Video Capture Sofware also lets the user adjust the resolution and frame rate of the output video.
Advantages: Very easy to use. Records not only microphone over screen capture, but system sounds as well.
Disadvantages: Consumes lots of system resources. Does not give the user the option to capture just part of the screen.
Website: http://www.nchsoftware.com/capture/index.html
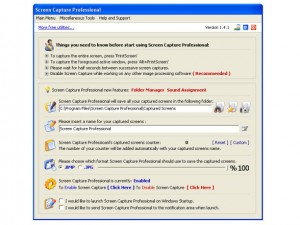
10. Screen Capture Professional
Description: Screen Capture Professional extends the Windows PrintScreen button functionality by automatically archiving all PrintScreen captures to a local folder on the user’s computer. Screen Capture Professional also lets you assign a sound to the PrintScreen key.
Advantages: Very easy to use. Runs in the background and uses very little system resources.
Disadvantages: No video functionality. Cannot capture a part of the screen. This software has no advanced features and does only simple archiving of screen captures to hard drive.
Website: http://www.download.com/Screen-Capture-Professional/3000-2192_4-10476765.html
Convert VGA to TV signal using tiny device
August 13, 2008 by Victor · Leave a Comment
How many times have you wanted to use a TV as a computer monitor? Maybe there has been a situation where you wanted to extend the output of your laptop or portable computer onto a TV screen but the computer did not have a TV output? While the TV-out was a standard port on older laptop computers, it is seldom found on modern portable and ultraportable computers.
This is where a device like the Grandtec GEZ-1000 VGA-to-TV converter comes in. About the size of a standard pencil eraser (4” x 2.25” x 1.25”), the GEZ-1000 takes a VGA signal and converts into a TV signal via a standard composite video RCA or S-Video cable.
The GEZ-1000 uses a starndard USB port to draw its power, so no external power source is required. Simply plug it into the VGA source, and composite video or S-Video output, and any available USB port, and the device will automatically begin relaying the VGA image to the TV it is connected to. If you are considering this converter, make sure to have long enough VGA and video cables available, as these are not included in the package.


