Epiphan Systems first to announce compatibility with Windows 7
July 31, 2009 by Victor · Leave a Comment
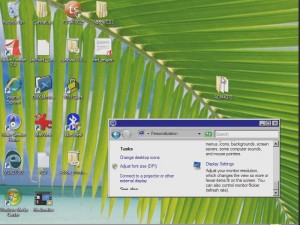
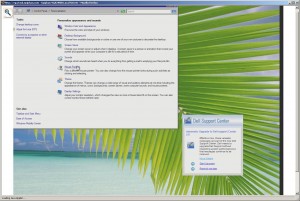
As the Windows 7 Release Candidate was made for free public downloading this week, manufacturers of hardware and software developers were able to test their software and hardware compatibility with Microsoft’s new operating system, slated to hit retail stores in October 2009.
Epiphan Systems, the manufacturer of external frame grabbers, recording, and broadcasting solutions for VGA and DVI has announced that all of its’ devices run smoothly under a Windows 7 environment and that the latest version of their software includes full support for this new operating system.
However, users may encounter some difficulties upon upgrading to this new OS, so it is still recommended that you reinstall the software when upgrading from XP or Windows Vista, as the drivers might not remain after the update.

ScreenCaptureNews will keep you updated as more software and hardware developers announce their products’ compatibility with Windows 7.
Capturing Video from Nintendo DS
July 7, 2009 by Victor · 8 Comments
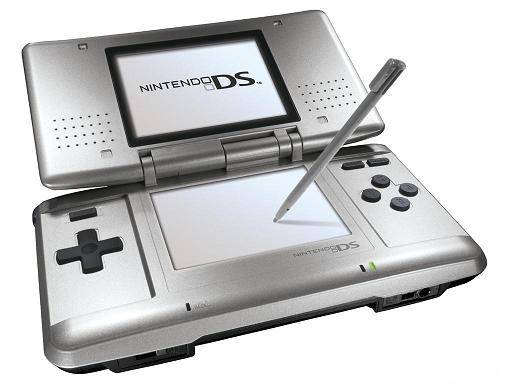
While some portable game systems like the Sony PSP have built-in screen capture, the DS from Nintendo is disadvataged in this respect. There is no simple way of capturing the screen by recording to a file, and the DS does not have a TV-out. This article will review and discuss several ways of recording videos from a Nintendo DS or DS Lite, as well as replicating the DS’ screen on a TV.
TV-out devices
The first way to output your DS’ screen to a monitor or TV is by using a third party TV-out device made specifically for the Nintendo DS. Initially, there were two different models available, but only one is being produced now.
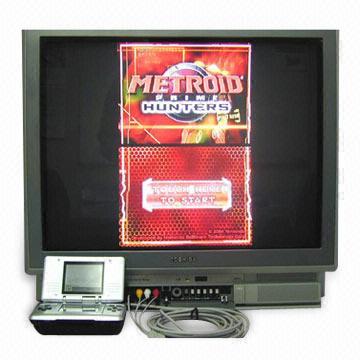
The now discontinued DS to TV adapter was made in Taiwan by Q-Mark. This is the best TV-out device available for the DS, letting you see the output of both LCD screens on a TV. The downside to the Q-Mark device is that the DS has to be modified in order to accomodate the TV adapter, making it bulky and less portable. The Q-Mark device is shown below.
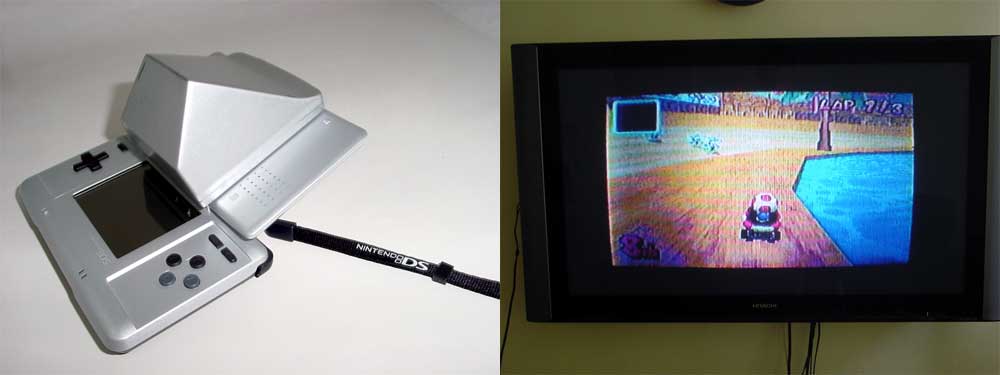
Another screen capture device for the Nintendo DS is the camera-based “Video Game Controller Adapter,” also made by Q-Mark. It can be purchased here and consits of a small device the slips over the upper screen of the DS, pictured below.
The latter device consists basically of a camera that is pointed at your screen, and, because of the way it is attached to the DS, only one screen is visible. Of course, quality is compromised as the camera optics are not of extremely high quality and lighting conditions severely impact this device’s operation.
Either way, if it becomes hard to find the DS to TV adapter and only the camera-based Q-Mark unit is available, it is still tolerable, as long as you intend on playing on one screen only.
Recording and broadcasting video from the Nintendo DS if using TV-out devices
If one of the devices mentioned above is used with the Nintendo DS, and the goal is to capture the video in order to record it, share it on a site like YouTube, or broadcast it, any capture card or video card with Video-in (RCA) will do the trick. YouTube even supports on-the-fly recording, so as long your capture card or video card is set as the webcam device in Windows, and your DS is connected to your capture card via one of the DS-to-TV adapters mentioned above, you’re ready for recording!
For live broadcasts, a variety of software can be used, but we recommend the free Windows Media Encoder. Details on how to use Windows Media Encoder in order to broadcast a video stream from an external device can be found here.
Using an Emulator to Record Gameplay
Using a software emulator on a computer is the cheapest and best way to record gameplay of the Nintendo DS, but is only really suited for short operations and not intended for lengthy game play. An emulator is a software program which replicates the functions of the Nintendo DS. In order to load games to it, you will need to find “ROMs” of each game. Downloading ROMs may be illegal depending on the laws of the country where you live.
Follow this link for a list of free emulators for the Nintendo DS. Once the emulator of your choice is up and running, you must simply capture your screen using either software for screen capture (we have reviewed lots of different programs in our Software as well as News sections) or by connecting a frame grabber to your computer monitor.
VGA2LAN Development Kit to revolutionize VGA capture market
May 26, 2009 by Victor · 2 Comments
When an organization, company, or individual has an idea for a VGA capture-based product, such as a webcasting system, a recorder of VGA signals, or any other VGA-related hardware product, a separate frame grabber is purchased, mated with a PC with software, packaged, and sold.
Solutions for capturing, broadcasting and recording presentations and seminars are often rediculously expensive ($10 000+) due to the fact that the original cost of the hardware (frame grabber + capture card + PC + peripherals) runs at half the retail value of the actual product. Not only did this make VGA capture-based solutions unaffordable to some, it also meant that educational institutions such as school and colleges had to spend an arm and a leg if they were to outfit every single one of their classrooms with such devices.
In order to solve this problem, Epiphan Systems has announced and is now shipping a new product aimed at capturing the market of developers, power users, and integrators – the VGA2LAN Development Kit. With a fully open-source architecture, a custom Linux build environment, access to all drivers and ports, the VGA2LAN is poised to create a revolution in the industry.
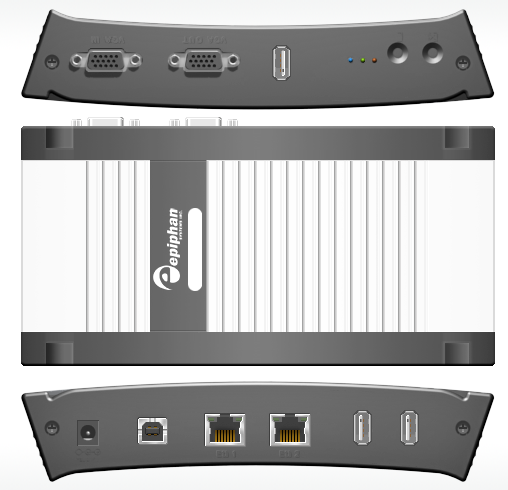
VGA2LAN Development Kit
What is it?
The VGA2LAN platform is based off of a Motorola PowerPC chipset and comes preinstalled with a custom build of Ubuntu. The basic specifications are as follows:
- 1 VGA input with integrated frame grabber
- 1 VGA output
- Integrated Gigabit Ethernet hub
- 5 USB 2.0 ports (4 external + 1 internal)
- No moving parts
In other words, the VGA2LAN is effectively a small PowerPC-based computer with an integrated frame grabber.
VGA Capture
Of course, what interests us most is the quality of VGA capture that this device can achieve. Does it really make sense to develop products using the VGA2LAN platform or is it still better to use an internal or external frame grabber paired to a PC? The basic specs are listed below and a full list of specifications can be obtained at Epiphan Systems’ web page:
- 2048 x 2048 maximum resolution
- 120 frames per second maximum capture rate
- Lossless quality
- 270 Mpixels/s pixel rate, 532Mpixels/s if interlaced
The specifications of the integrated frame grabber are comparable to those found in high-end devices costing upwards of $2000. A detailed comparison of VGA frame grabbers can be found here. And, since the price of the VGA2LAN Development Kit is under $1000, it makes sense to use it instead of a computer + frame grabber combo often costing 5 times that amount.
A Platform for Next Generation Internet Appliances
The VGA2LAN does not come with any internal memory. However, USB 2.0 flash memory drives can be purchased for pennies on the dollar and are sold in all capacities up to 128GB, meaning that you have plenty of buffer space to work with. Furthermore, the 4 external USB ports can be used to connect external hard drives and other storage media, such as CD, DVD, or Blu-Ray burners, infinitely expanding the VGA2LAN’s storage capacity.
Since the VGA2LAN is an open source platform, devices such as USB Wi-Fi antennas can be connected in order to provide wireless communications, should the integrated Gigabit Ethernet network card not be sufficient for your application. Furthermore, the presence of USB 2.0 ports means that peripherals suchs as keyboards, mice, AMX/Crestron control units, and others can be interfaced with the VGA2LAN, making it perfect for virtually any application that involves the capture of VGA signals.
The VGA2LAN Development Kit is a great way to build, use, and sell hardware products for a company or organization that doesn’t have the resources, finances, or expertise to manufacture their own capture hardware. And, at a price of $999 US, it is most definitely a bargain.
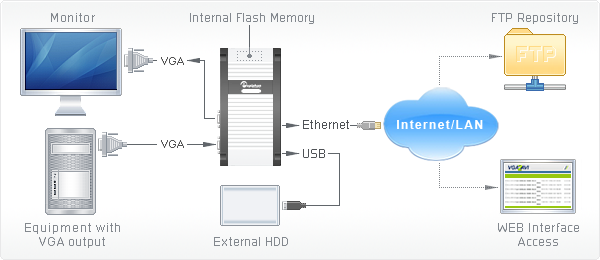
Example of how VGA2LAN can be used
Online applet allows users to share their screens for free
The market is full of applications designed to share, webcast, or broadcast a user’s computer screen over the web. What separates this application apart from the competition is that it’s a web-based applet. Vyew (pronounced “view”) is compatible with all recent browsers (Internet Explorer, Firefox, Safari etc) and platforms (Windows, Mac or Linux). All that the user needs in order to use this application is Java and Flash installed on their PC.
Vyew is a great altenative to programs like PCAnywhere, TightVNC, that require you to install software on the source and target computers. What’s more, the free version of Vyew does not require you to sign in to the website, allowing the user to initiate the entire desktop sharing proccess in a matter of seconds.
Usability
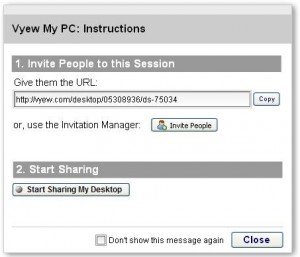
Operation of the Vyew applet is extremely simple. Start by going to Vyew.com. From there, click on “Start Sharing Desktop.”
Save the URL that is given to you and give it to all those that you would like to share your screen with. This is the address that your viewers will use in order to log into your Vyew session. Now click on “start sharing my desktop”.
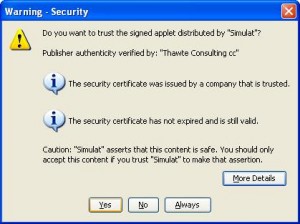
You will get a warning for allowing the applet access to your computer. Press “Yes”.
Now when any of your viewers enter the URL that was supplied to you before the webcast was started, they will see everything that you are doing on your desktop in real time. The viewers can chat with the broadcaster by clicking on the little tab visible on the left side of their screen.
Quality
Vyew tracks the cursor of the source machine, and this is the reason why all cursor movements are very fast and accurate. The free version of Vyew is only able to perform screen capture at a rate of about 1-2 frames per second, thus everything on the screen of the viewer is visibly slow. The person sharing must always rembember this and avoid doing things so fast that the Vyew refresh rate cannot keep up.
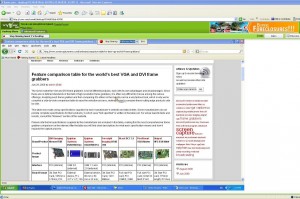
The resolution, picture quality, and sharpness in Vyew is very good. Even fine print is perfectly readable and all images are still fairly sharp.
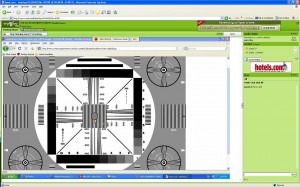
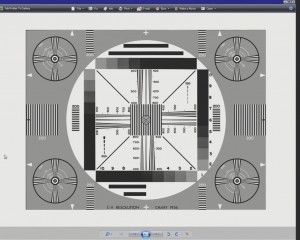
Here you can see a resolution chart that was broadcast to a remote user through Vyew. It is still sharp and retains most of its’ quality. This is great for not just general remote desktop sharing, but also showing presentations, spreadsheets, and Word documents.
Conclusion
Overall, Vyew is a pretty impressive web-based application. There are no intrusive advertisements on the Vyew website, which is another pleasant surprise for a free service like this. There is only a small banner ad in the top right corner. All of the free screen sharing sessions go through the Vyew servers over an unencrypted connection and do not offer the user any options to protect their content. Simulat, the company that makes this applet, hopes that some users will subscribe to their pay service, which offers features like encryption, voice and webcam broadcasting, advanced teleconferencing, and archiving.
While it is unfortunate that more advanced features like audio sharing were not included in the free version and that the refresh rate is so slow that only static pictures and text can be broadcast, the functionality and ease of use of Vyew is still pretty impressive for a completely free service. This applet is perfect for those that need to share their desktop only once in a while and without any hassles.
Epiphan Systems VGA2USB LR
August 1, 2008 by Victor · 2 Comments
A Thorough Look at the VGA2USB LR from Epiphan Systems
The Basics
I needed a quality VGA capture solution but didn’t want to spend a fortune on it. At just under $800, the VGA2USB LR from Epiphan Systems seemed to be exactly what I wanted. In this review, I will look at the good and bad of this tiny frame grabber and explain its features.
The Box
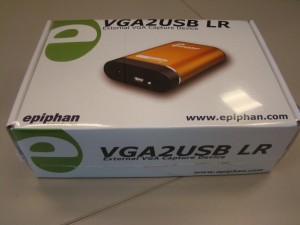
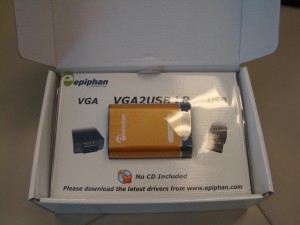
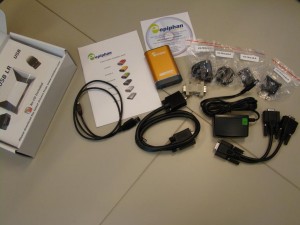
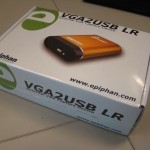 The packaging for the VGA2USB LR is pretty standard. Like other computer components, it comes in a simple flip-top cardboard box with specifications and a list of components that should be inside the box. Upon opening the box, the VGA2USB LR is nicely packed in the center with a transparent molded plastic cover over it. It is pretty simple, yet gives off a very good impression. The one thing that catches your eye right away is the “No CD Included” writing. It is actually quite surprising that a product of this price has no installation or driver disks included. This is probably due to the fact that Epiphan issues regular driver and software updates on its website. The box also contains a small instruction booklet to help you get running, USB and VGA cables, and, to my delight, a universal power supply with several plugs that can be used in both Europe and North America. Even though this might not be a big advantage, I found this to be a pleasant surprise.
The VGA2USB LR comes in pretty standard packaging
As soon as you open the box, the device reveals itself. All the cables are buried beneath the cover.
The LR comes with an impressive set of accessories. This includes a manual, USB cable, VGA cable, passive VGA Y-splitter, male-to-male VGA adapter, and a universal power adapter with plugs for North America, Europe, Australia, and UK.
The Device
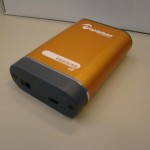 Epiphan Systems makes the only external, portable frame grabbers in the world, so there is not much that they can be compared with.
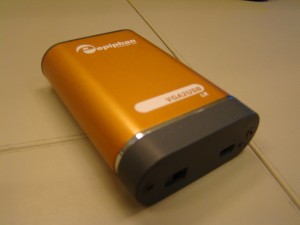
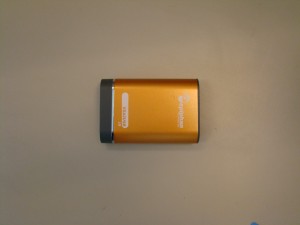
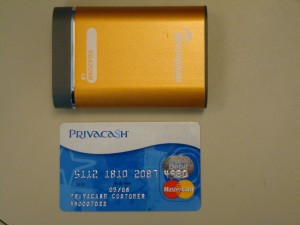
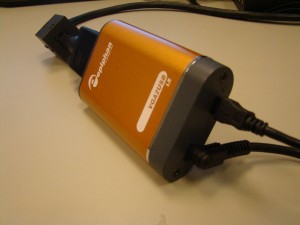
Overall, the design of the VGA2USB is very sleek and pleasing to look at. It is of a nice orange color and it is made entirely of brushed aluminum, which makes the device feel very solid in your hands. The whole thing is about the size of a credit card in terms of length and width, and about an inch (~2.5cm) in height.
The cables included are what one would expect, including the standard USB mini-B cable and the male-to-male VGA cable. The little plugs included with the universal power adapter seem flimsy at first but clip into the adapter housing very snugly and should not break.
The VGA2USB LR is of a gold/orange color.
It is a fairly small device and is of rectangular shape when viewed from top.
In fact, the VGA2USB LR is about the size of a credit card (width x height).
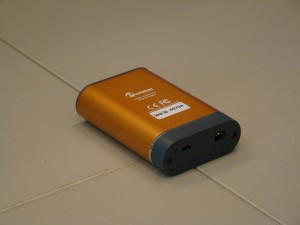
The serial number, FCC and CE certifications are printed out on the back of the device. The VGA2USB LR is made in Canada.
Installing
Installation of the VGA2USB LR on a Windows XP machine is pretty straight forward. Plugging the device in and letting Windows find the drivers through Windows Update did not yield any results. The drivers must be downloaded from the “Download” section on the Epiphan Systems website.
During the installation of the drivers, Windows XP gives a warning of the drivers not passing the “Windows Logo Test.” This happens often with devices of small manufacturers and is not a big deal. Just press “Continue” to finish the installation.
The Epiphan VGA2USB software gets automatically installed with the drivers. Unfortunately, Epiphan did not give the user the choice of installing the drivers and software separately. What’s more, the drivers can only be downloaded with the new version of the software and vice-versa. This is surprising as the VGA2USB LR does not need specific VGA2USB software in order to be able to function via other WDM-capable software such as Windows Media Encoder.
VGA2USB LR appears as a high-resolution video camera under My Computer
The Software
The software included with the VGA2USB LR seems pretty simple at first but actually has a lot of settings and various “tweaking” capabilities to provide the user with the best possible picture. In most of the capture environments that I was testing in, I found that, most of the time, the software does a good job at capturing the picture.
The software displays the capturing resolution, update rate, and monitor refresh rate in the lower right corner of the window.
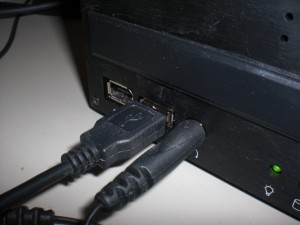
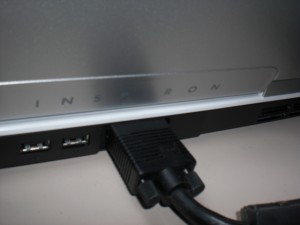
In order to start the capturing process, one must simply plug the USB, power, and VGA cables into the VGA2USB LR. The VGA and USB cables need to be plugged into the source and target computers. The power cable is also required. Once everything is plugged in and the software is started, the VGA2USB software automatically “tunes” the resolution and frame rate to the output of the VGA source.
When the VGA, USB, and power cables are connected to the VGA2USB LR, the LR automatically tunes to the source signal.
The USB and VGA cables must be plugged into the target and source machines, respectively.
Configuration
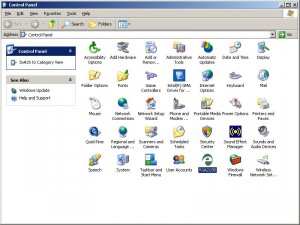
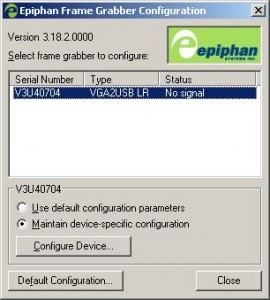
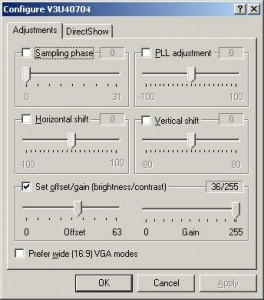
The VGA2USB LR can be configured in several locations. A “VGA2USB” icon now appears in the Windows XP Control Panel. Selecting it will display a list of all VGA2USB devices connected to the computer along with the devices’ respective serial numbers. Once a VGA2USB device is selected, you will see that the “Use default configuration parameters” radio box is selected. You may configure advanced settings of each frame grabber by selecting the “Maintain device-specific configuration” radio box and then clicking on the “Configure Device…” button. Here, expert users can adjust sampling phase, PLL adjustment, horizontal shift, vertical shift, offset, and gain of the captured picture. As the VGA2USB LR comes with DirectShow (also known as Video for Windows) drivers, the device appears as a high resolution camera and can be used with virtually any capture software. If you are using DirectShow software instead of the included program, several settings may be adjusted under the “DirectShow” tab.
Several configuration settings also exist within the VGA2USB software itself. Selecting “Options..” from the Tools menu lets the user set the codec or image compression to be used during the recording. The user has the ability to limit the captured frame rate, which is useful when the file size of the captured output needs to be reduced. This screen also lets the user choose the display format randing from black and white to 24 bit RGB. There are also other options like flipping the image vertically or inverting the colors for printing (see screenshot).
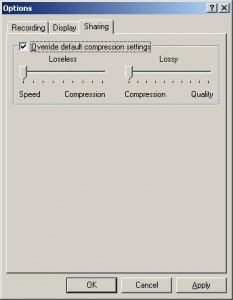
The VGA2USB software also has a built-in broadcast/webcast option, and the quality settings of the compression can be configured under the “Sharing” tab. In that tab, you will notice that there are two sliders – “Lossless” and “Lossy.” These two options are not explained anywhere and can be confusing for those that do not have experience with video compression. Increasing the “Lossless” slider will yield higher sharpness in distinct parts of a frame, such as small text or complex diagrams. Increasing the “Lossy” slider will yield to higher sharpness in less distinct parts of the image, such as in blank areas or pictures with low details. The sharing/webcasting feature of the VGA2USB LR will be discussed later in this review.
The Epiphan VGA2USB icon now appears under the Windows XP Control Panel
Clicking on the VGA2USB icon will reveal a list of connected devices and allow you to configure the device settings.
An array of adjustments is found under the “Configure Device” option.
More options, such as those for broadcasting, are found within the VGA2USB software itself.
Recording
Recording through Epiphan’s VGA2USB software is very simple. As soon as the VGA2USB LR is powered on and connected to the VGA source and the USB on the target computer, just fire up the software and press on the round “Record” button near the top of the window. The software will ask you where you would like to save the video to and will start recording once you give it the location. Wasn’t that easy?
Below is a short video clip captured by the VGA2USB LR at a resolution of 1280 x 1024. The XVid codec was used to compress the video at medium quality. Note that the resolution chart at the beginning and end of video is of ideal quality. There are no visible artifacts in the fast-motion YouTube video, and the captured image looks like a 1:1 copy of the VGA output.
Download Video (.avi; Xvid codec; 58sec; 7.31MB)
Screenshots can also be made by going selecting File>Save As.. Similarly, a screenshot can be instantly printed by selecting File>Print.
The image above was captured from a laptop running Windows Vista.
Broadcasting
As stated earlier in this review, the VGA2USB LR can be used to broadcast a VGA signal. One way to do this is to use a webcasting program like Windows Media Encoder or QuickTime Broadcaster. This option is best for power users as this allows for lots of customization and quick integration into websites and applets. Using a third party webcast software is also the only way to simultaneously broadcast VGA and audio over one stream.
For those users, however, who just need to share the VGA signal captured by the live VGA2USB LR over the web and do not want to deal with any confusing settings or configurations, Epiphan Systems included a simple one-click “Web Broadcasting” option which can be accessed from the Tools menu.
This has got to be the simplest broadcasting feature that I’ve ever used. As soon as the “Web Broadcasting” option is selected, the program provides the user with an address that should be given to those who the webcast is being shared with. The viewers then go to the address provided to view the broadcast.
No configuration is involved, which is what makes the broadcast feature so nice. On the other hand, the broadcast feature is labeled as a “Demo,” even though no software limitations seem to be present. Unfortunately, there is no way to schedule your broadcast or encrypt the data. In order to get these features you would either have to purchase the VGA2WEB or use a third party broadcasting solution (a few tutorials can be found one Epiphan’s web site).
The quality of the broadcast is pretty good. The picture is sharp and the refresh rate is fairly high, depending on the amount of movement in the original VGA source image. Of course, as stated earlier in this review, the user does have a limited amount of control over the trade-off between speed and quality, but that is as far as configuration goes in the VGA2USB software from Epiphan Systems.
This is what the http://vga2usb.epiphan.com interface looks like for the viewer. Clicking the magnifying glass icon in the top left allows the viewer to zoom in on the picture.
Internals
For those power users who want to know exactly what they are working with, I ventured to disassemble the VGA2USB LR to have a look at the components that make this device work.
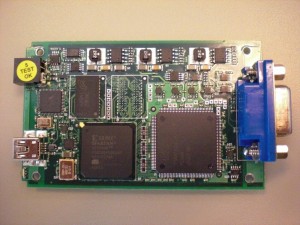
At the core of the VGA2USB is a XILINX Spartan-3 XC3S400 programmable FPGA. This FPGA is part of the new and most recent Spartan-3 family of “Field Programmable Gate Arrays” and is programmed by the manufacturer. It has 400 000 system gates and 8 064 logic cells.
The on-board ADC (analog to digital converter) is manufactured by NXP, a former division of Philips Electronics. It is the TDA8754HL model, which is a very capable triple 8-bit ADC and runs up to 270 Msample/s. It is optimized for RGB/YUV signals (also known as VGA) and supports resolutions of up to 2048 x 1536 at 85 Hz, even though the VGA2USB LR handles resolutions of up to 1280 x 1024. Detailed specs are listed below:
- 3.3 V power supply
- Temperature range from -10Cel to +70Cel
- Triple 8-bit ADC:
- 0.25 LSB Differential Non-Linearity (DNL)
- 0.6 LSB Integral Non-Linearity (INL)
- Analog sampling rate from 12 Msample/s up to 270 Msample/s
- Maximum data rate:
- Single port mode: 140 MHz
- Dual port mode: 270 MHz
- 3.3 V LV-TTL outputs
- PLL control via I2C-bus:
- 390 ps PLL jitter peak to peak at 270 MHz
- Low PLL drift with temperature (2 phase steps maximum)
- PLL generates the ADC sampling clock which can be locked on the line frequency from 15 kHz to 150 kHz
- Integrated PLL divider
- Programmable phase clock adjustment cells
- Three clamp circuits for programming a clamp code from -24 to +136 by steps of 1 LSB (mid-scale clamping for YUV signal)
- Internal generation of clamp signal
- Three independent blanking functions
- Input:
- 700 MHz analog bandwidth
- Two independent analog inputs selectable via I2C-bus
- Analog input from 0.5 V to 1 V (p-p) to produce a full-scale ADC input of 1 V (p-p)
- Three controllable amplifiers: gain control via I2C-bus to produce full-scale peak-to-peak output with a half LSB resolution
- Synchronization:
- Frame and field detection for interlaced video signal
- Parasite synchronization pulse detection and suppression
- Sync processing for composite sync, 3-level sync and sync-on-green signals
- Polarity and activity detection
- IC control via I2C-bus serial interface
- LQFP144 and LBGA208 package:
- LBGA208 package pin-to-pin compatible with TDA8756
The USB communications are handled by a Cypress Semiconductor CY7C68013 chip. The on-board buffer memory is comprised of a single 16MB RAM chip (Z9DNC) from Micron.
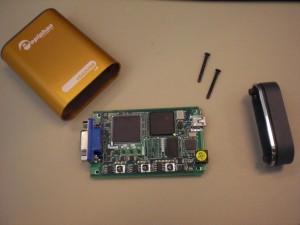
The circuit board is easy to remove as it sits on rails within the VGA2USB LR housing and is held on by two long screws.
The VGA2USB LR board is pretty standard. It looks like there is a location for another RAM chip but it is not used. The quality of the soldering is what one would expect for such a product.
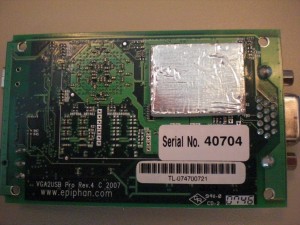
The large aluminum foil-like pad is a thermal pad which is used to cool the NXP ADC. It functions similarly to a heatsink, but is not as effective. The circuit board also contains the year of manufacture, revision, and serial number. Surprisingly, the revision of my LR board had “VGA2USB Pro” written on it, which makes me believe that the same PCB is used in the PRO version of the VGA2USB. This would also explain the empty location for RAM memory.
Why frame grabbers?
A question that may arise is why use frame grabbers at all when there is plenty of great screen capture software on the market? There are several good reasons why an external frame grabber like the VGA2USB actually works best in most situations.
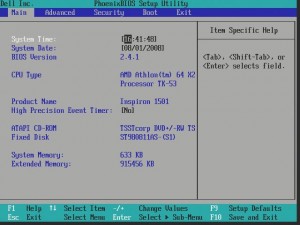
Firstly, I need to take screenshots and videos of obscure screens such as a computer BIOS screen and boot screens. Images from these screens cannot simply be grabbed using a pure software solution, as no software can be running at this point.
Secondly, in order to capture images off of embedded devices that have a VGA output but do not run any operating system, such as GPS, radar, ultrasound, electronic microscopes, video game consoles and high resolution cameras, a frame grabber is required in order to record the VGA or DVI signal from the output.
Finally, a frame grabber is the most secure screen capture solution available. It requires no modification to the source device as it simply taps into the VGA stream (often using a VGA splitter). This means that no security issues are raised, as no additional software has to be installed on the source. What’s more, the captured recording is a 1:1 copy of the signal.
Why VGA2USB LR?
Some may be wondering why I chose to purchase the $800 VGA2USB LR over the cheaper $300 base VGA2USB model, or even over the VGA2USB HR. The reason is that I found the VGA2USB LR to be the better “deal” out of all of the frame grabber models that Epiphan offers. The $300 VGA2USB model has an interlaced image grab (results in artifacts and poor quality) while the VGA2USB LR has all the features of its more advanced siblings (VGA2USB HR and VGA2USB PRO) such as integrated buffer memory, proprietary precompression, and a lossless progressive image grab. At the same time, the VGA2USB LR is half the price of the better HR model. The only limitation that the LR model has is that the maximum capture resolution is 1280 x 1024, which happens to be enough for all of my VGA capturing and recording needs.
Quality of VGA2USB LR
The capture quality of the VGA2USB LR is as expected from an $800 device. The images are lossless and of very high quality. Video is captured at rates of around 30 frames per second and is also of extremely good quality. Overall, this product does exactly what the manufacturer describes – captures lossless images and videos at resolutions of up to 1280 x 1024.
The only problems that I’ve had when testing the LR’s video capture is with lots of movement in the picture. As soon as there is lots of changes in the picture from frame to frame, the capture rate can fall as to as low as 10 updates per second. While the frame sharpness and quality is still at a very acceptable level, this makes the video appear choppy and “slow”. Thus, the VGA2USB LR would not be a good choice if you are planning to capture, for example, an HD movie with lots of action scenes.
See below for example captures:
A BIOS screen is simple to capture with the VGA2USB LR frame grabber.
VGA2USB LR at 1280 x 1024 resolution. Capture of resolution chart.
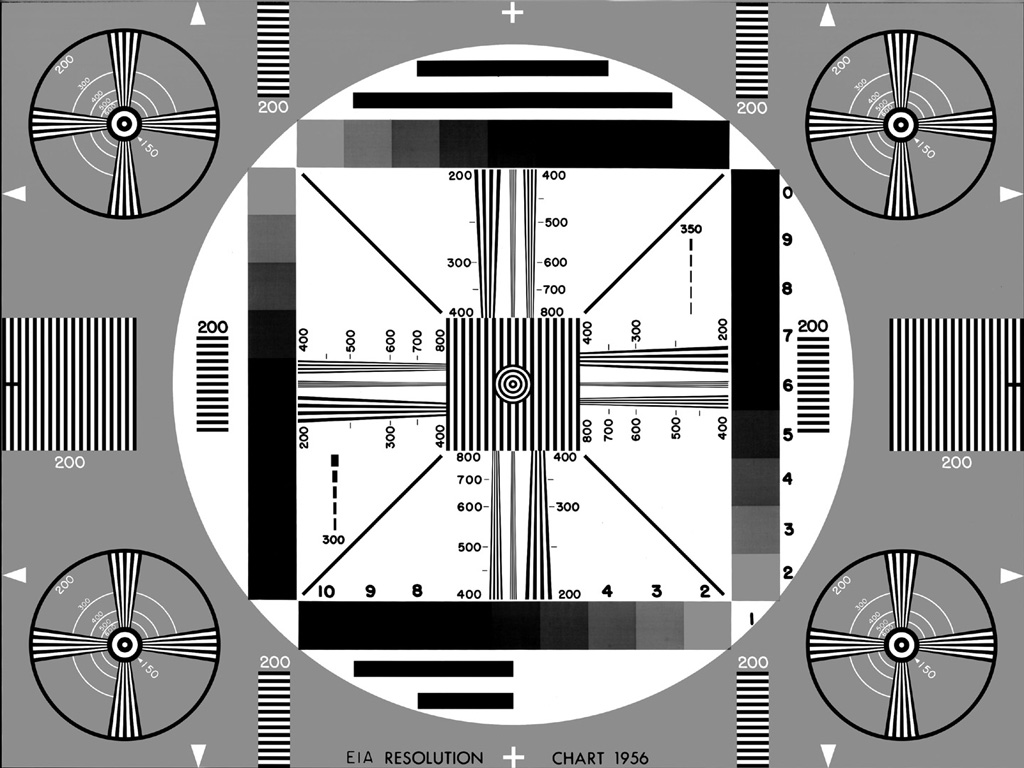
Original resolution chart. Note how quality of the original is almost identical to the chart captured by the VGA2USB LR.
Capture screen activity or webcam as a movie with Microsoft Windows Media Encoder
July 30, 2008 by admin · Leave a Comment
 Microsoft Windows Media Encoder is a powerful tool to capture audio and video content using Windows Media, including high-quality multichannel sound, high-definition video quality, and support for mixed-mode voice and music content.
The tool is available for free download from Microsoft website.
Note that Microsoft requires you to run Genuine Advantage Validation to get Encoder 9. Once installed it allows you to create custom encoding sessions and do broadcasting. You may use it to record or broadcast live events from attached camera or do conversion from different video and audio formats into Windows Media File format. Encoder 9 allows to selected different capture sources such as attached webcams, installed capture cards or just do plain screen captures. Once input device is selected – the program is all ready to save your capture in .WMV format.
Together with saving the file – Encoder 9 lets you choose distribution (broadcasting) method – streaming via Windows Media Server, other web server ot watched directly via computer.
Special menu allows to adjust for different bandwidth (slow to fast connections).
Flexibility of options and ample number of features makes Media Encoder 9 great addition into your screen capture toolbox


