A Brilliant Way to Quote
October 15, 2008 by Victor · Leave a Comment
How often have you wanted to quickly grab a screenshot of a webpage and post it online, publish it to a forum, e-mail it to your friends, or just save it to your computer? Of course, all these tasks are easily accomplished by complicated programs or browser add-ons, but what if you could do all that without ever actually installing anything?
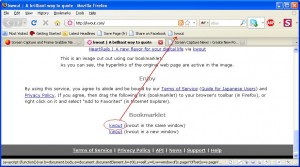
This is where Kwout (pronounced like “quote”) comes in. Kwout is what is called a bookmarklet and is launched simply by adding the link provided to your bookmarks and then launching the bookmark. For convenient use, you can drag the link directly onto your toolbar, as shown below.
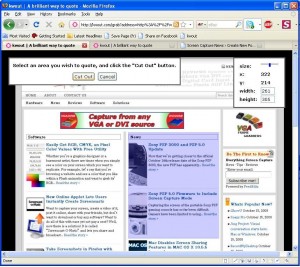
That’s it! You can now take screenshots of webpages, images on webpages, and even save text with links by going to the bookmark that you just added. When you see something on a website that you would like to save, simply click on the bookmark and follow the easy to use proccess. First, you will have to select the area of the webpage that you want to capture and click on “Cut Out”.
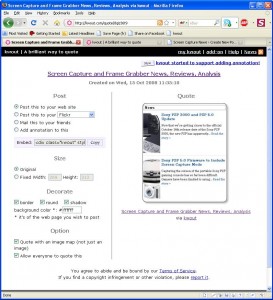
You will now be shown your captured area. At this point, you can customize the way it looks, add annotations, and select where to post it. You can copy/paste the HTML code given to put it directly on your site or blog, you can e-mail it to your friends, or post it to one of these photo-sharing and content sharing sites:
- Flickr
- Tumblr
- Blogger
- Vox
- sa.yona.la
- Livedoor Blog
- Ameba Blog
- Hatena Diary
- Excite Blog
- Cocolog
- So-net Blog
That’s it! You have now posted an exceprt/screenshot from another webpage! Keep this tool in your bookmarks, it’s easy to use and absolutely free. You never know when it could come in handy.
Source: http://www.kwout.com/
New Online Applet Lets Users Instantly Create Screencasts
Want to capture your screen, create a video of it, post it online, share with your friends, but don’t want to download or buy any software? Want to do all of this with ease yet not pay a cent? Well, now there is a solution! It is called “Screencast-O-Matic” and lets you share and broadcast a recording of your screen for free. This solution is Java-based (requires Java 1.5 installed) and works flawlessly with Internet Explorer, Firefox, and Opera on both Windows and Mac OS. Screencast-O-Matic is also supposed to work with Linux, but it seems like the developers are still working out the final kinks.
Screencast-O-Matic can post screen captures up to 15 minutes in length on their free hosting but it also lets you save the captures as .MOV QuickTime files so you can do whatever you want with your captured content.
Unfortunately, Screencast-O-Matic has some major limitations that make the applet unappealing to some. First of all, it can only capture a maximum resolution of 1024×768 and maintain a capture rate of only 2 frames per second. This is ok for text, but not good if you want to show videos or animations in your screencast. What’s more, Screencast-O-Matic does not have support for dual-monitor systems (it can only capture from your primary monitor). Click here for a sample screencast that we created with Screencast-O-Matic to see for yourself.
Using Screencast-O-Matic
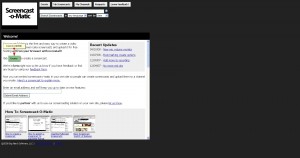
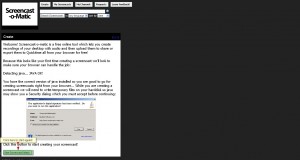
Step 1: Visit http://www.screencast-o-matic.com/ and click on “Create”.
Step 2: You will be prompted to start the Java applet. Click on “Start” at the bottom of the page. A security verification might come up, which you must also allow in order for the applet to start.
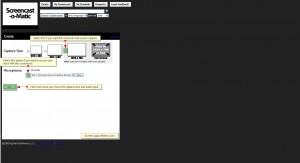
Step 3: Once you have allowed the applet access to your computer, you will now see a configuration screen. Unfortunately, Screencast-O-Matic only supports resolutions up to 1024×768, so you must select that option for maximum quality. Screencast-O-Matic also lets you add voice to the video. Once you have configured the options, click on “Go!”
Step 4: At this point, you will see a black frame come up on your screen. It cannot be resized. Drag it over the area which you would like to capture and follow the instructions supplied by Screencast-O-Matic:
- Drag the black frame so it surrounds the area of the screen that you’d like to capture.
- If you are recording audio, make sure the mic level is ok by talking into your mic and watching the
 icon. You may also need to adjust the mic recording volume for your operating system. See examples for Windows XP and Mac OS X.
 - Click the
 button to start recording the part of your screen inside the black frame (and audio from the mic you chose).
 - Click the
 button when you are done (or if you need to pause click
  button).
If you are working on a dual-screen setup, Screencast-O-Matic won’t allow you to capture from your secondary screen.
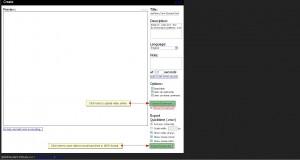
Step 5: Once you have completed yor capture, you will be able to either upload the video right away or save it on your computer as an .MOV file. If you are uploading your screencast, Screencast-O-Matic will prompt you to register a username and passoword on their website. Screencast-O-Matic will then give you a URL for your upload.
Step 6: You’re done! Now you can share the link that was given to you previously and have people access your screencast. Here is a sample screen capture that we did in-house: http://www.screencast-o-matic.com/watch/cjQvQrnnV
Take Screenshots in Firefox with New Add-on
September 30, 2008 by Victor · Leave a Comment
Have you ever wanted to quickly capture a webpage that you are visiting and save the screenshot or send it in an e-mail? What if you need to share your screenshot online with many users (for example, on an online forum)? Maybe you want to create instructions to show users how to navigate a web page and do not want to spend a fortune on special screen capturing and annotating software like Camtasia. If you answered “yes” to any of the previous questions, then this free add-on to Firefox should be something to be looking into.
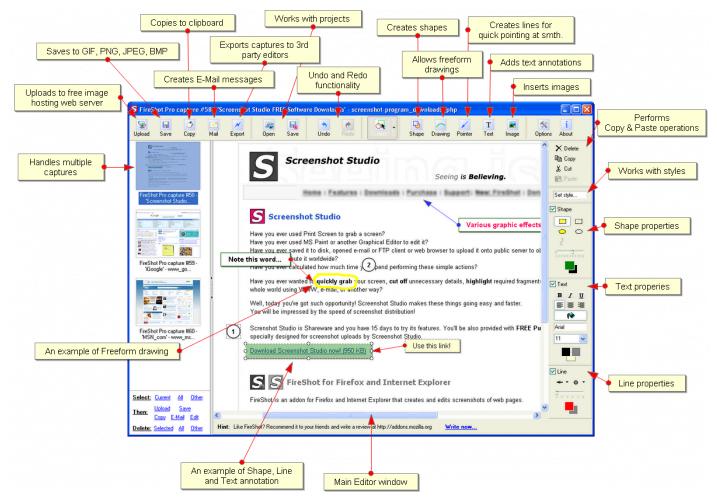
The FireShot Add-On for FireFox is 100% free and is compatible with Firefox 2 and Firefox 3. It adds the following functionality to your Firefox browser:
- Instantly upload screen captures to FREE public screenshot hosting
– save screenshots to disk (PNG, GIF, JPEG, BMP)
– print screenshot
– copied to clipboard (similar to PrintScreen button)
– Attach screenshot to e-mail
– Annotate and add text and instructions to screenshot
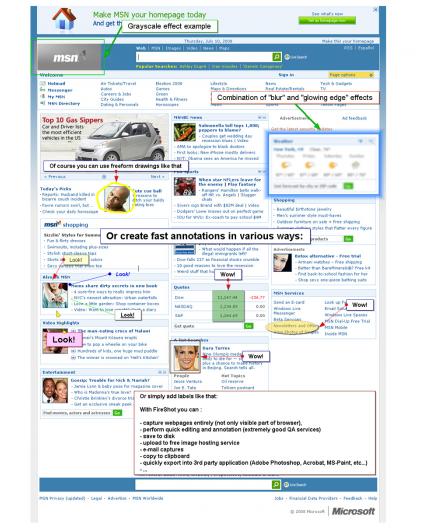
The image above describes the features of the FireShot add-on screen capture editing and annotation tool. As you can see, the add-on has a good array of features and should be sufficient for any sort of simple editing and annotating.
What’s more, FireShot has the ability to add effects to the captured screenshots. This is especially useful if you would like to emphasize a particular section of a webpage or want to hide part of the webpage from the screenshot (if there is a user name or revealed password, for example).
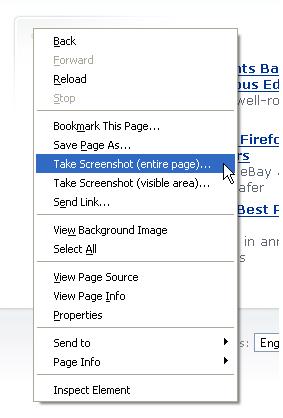
FireShot is accessible both by right-clicking on the webpage that you are browsing or by clicking on the “S” icon beside the address bar.
FireShot can be downloaded here. This add-on is recommended for anyone that regularly needs to take screenshots from their browser or for those that need to create instructional manuals related to the online world.
Capturing screenshots and data from Garmin GPS devices
August 12, 2008 by Victor · 5 Comments
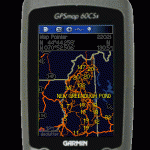 The market of navigational products is cluttered with a multitude of manufacturers, solutions, and products. Historically, Garmin came out as one of the most popular manufacturers of portable handheld GPS devices.
While industrial and military consumers tend to use high resolution frame grabbers in order to capture the screen from advanced GPS devices with VGA outputs, this is not an option for those users that have small personal GPS receivers.
There are several ways to capture the screen of a Garmin GPS device for free:
- Using xImage software supplied by Garmin. (last update in 2005)
- Using G7ToWin software developed by Ron Henderson. (last update in 2008)
- Using the DNR Garmin application written by the Minnesota Department of Natural Resources. (last update in 2008)
Due to the fact that there are a lot of different Garmin GPS models, not all software programs will work with all Garmin devices. The G7ToWin application also has limited functionality with Magellan GPS receivers. All of the software packages listed above are available as free downloads.
xImage
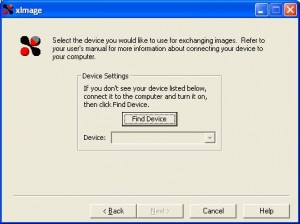
Installation of the xImage software is easy. Download the last release from here, launch the file, and follow the on-screen instructions. You can the launch the xImage application from the Garmin submenu in the Windows Start Menu. The GPS must then be connected via USB or serial port for the software to be able to locate it.
Follow these instructions in order to capture a screenshot from your Garmin GPS device. Remember that the GPS must be connected to the capturing computer at the time of the screen capture.
1. Connect your device to your computer. Verify that you have selected the ‘Garmin’ I/O format on your GPS unit. See your GPS unit’s owner’s manual for more information.
2. Open xImage and click Next.
3. After a few moments, your device should be listed in the Device Settings window. If not, click Find Device. xImage finds the connected device. If you have multiple devices connected to your PC, select the desired device from the drop down list.
4. Click Next.
5. Select Get images from the GPS, then click Next.
6. Select ‘Screen Shot’ in the Image Type field.
7. Verify that the desired screen is currently displayed on your GPS.
8. Click Next.
9. Select the desired location on your PC, enter a file name for the screen shot, and click Save. The screen shot is saved as a .bmp file on your PC. xImage displays a preview of the screen shot.
10. Click Finish to close xImage.
NOTE: You can also click Back to return to a previous screen and perform additional tasks.
G7ToWin
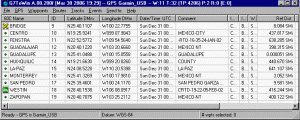
Download G7ToWin from here and install by following the prompts. Once the software is installed and your GPS device is connected, the G7ToWin software will bring you to a main screen that displays all of the waypoints saved in the GPS.
From here, the “Get and Show Display Bitmap” option must be selected from the GPS menu. This takes a screenshot of what is currently being shown on the GPS and saves it to the local hard drive. As well, the Ctrl+D keystroke combination may be pressed to grab the GPS’ screen at any time.
DNR Garmin
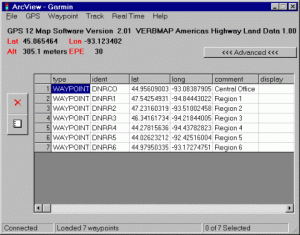
DNR Garmin may be downloaded from here. This application was created by the Minnesota Department of Natural Resources for their internal use, but the department also released the software to the public as a free download. This software is designed for power users and has many advanced functions.
Once the software is instalelled and the GPS receiver is synchronized with the DNR Garmin software, taking a screenshot is as easy as going to the GPS menu, and selecting “Garmin Screen Shot”. The program will then prompt you for a location of where to save the screenshot .bmp file.
Conclusion
xImage, G7ToWin, and DNR Garmin are all capable of saving the contents of the Garmin GPS’ screen to a BMP file on the computer the GPS is connected to, whether it be through a USB or serial port. Note that it is not possible to capture a screenshot of the GPS device when it is not connected to a computer on which one of these software packages is installed.
Using this software, there is also no way to automate the capture proccess or have the GPS screen’s output captured as a movie. This would be useful for archiving or creating instructional videos, for example. If real-time and automated screen capture is required, then a device with a VGA or DVI output coupled with one of these frame grabbers would allow the user to have that functionality.
Online applet allows users to share their screens for free
The market is full of applications designed to share, webcast, or broadcast a user’s computer screen over the web. What separates this application apart from the competition is that it’s a web-based applet. Vyew (pronounced “view”) is compatible with all recent browsers (Internet Explorer, Firefox, Safari etc) and platforms (Windows, Mac or Linux). All that the user needs in order to use this application is Java and Flash installed on their PC.
Vyew is a great altenative to programs like PCAnywhere, TightVNC, that require you to install software on the source and target computers. What’s more, the free version of Vyew does not require you to sign in to the website, allowing the user to initiate the entire desktop sharing proccess in a matter of seconds.
Usability
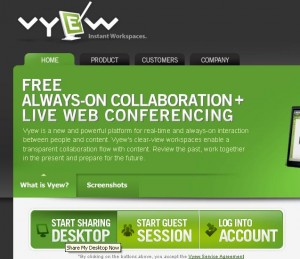
Operation of the Vyew applet is extremely simple. Start by going to Vyew.com. From there, click on “Start Sharing Desktop.”
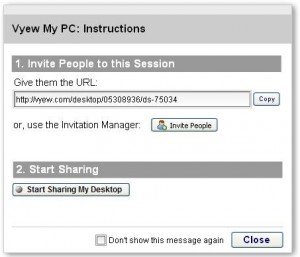
Save the URL that is given to you and give it to all those that you would like to share your screen with. This is the address that your viewers will use in order to log into your Vyew session. Now click on “start sharing my desktop”.
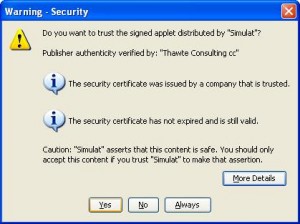
You will get a warning for allowing the applet access to your computer. Press “Yes”.
Now when any of your viewers enter the URL that was supplied to you before the webcast was started, they will see everything that you are doing on your desktop in real time. The viewers can chat with the broadcaster by clicking on the little tab visible on the left side of their screen.
Quality
Vyew tracks the cursor of the source machine, and this is the reason why all cursor movements are very fast and accurate. The free version of Vyew is only able to perform screen capture at a rate of about 1-2 frames per second, thus everything on the screen of the viewer is visibly slow. The person sharing must always rembember this and avoid doing things so fast that the Vyew refresh rate cannot keep up.
The resolution, picture quality, and sharpness in Vyew is very good. Even fine print is perfectly readable and all images are still fairly sharp.
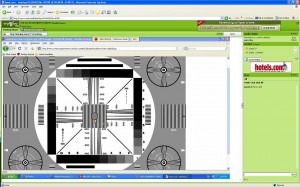
Here you can see a resolution chart that was broadcast to a remote user through Vyew. It is still sharp and retains most of its’ quality. This is great for not just general remote desktop sharing, but also showing presentations, spreadsheets, and Word documents.
Conclusion
Overall, Vyew is a pretty impressive web-based application. There are no intrusive advertisements on the Vyew website, which is another pleasant surprise for a free service like this. There is only a small banner ad in the top right corner. All of the free screen sharing sessions go through the Vyew servers over an unencrypted connection and do not offer the user any options to protect their content. Simulat, the company that makes this applet, hopes that some users will subscribe to their pay service, which offers features like encryption, voice and webcam broadcasting, advanced teleconferencing, and archiving.
While it is unfortunate that more advanced features like audio sharing were not included in the free version and that the refresh rate is so slow that only static pictures and text can be broadcast, the functionality and ease of use of Vyew is still pretty impressive for a completely free service. This applet is perfect for those that need to share their desktop only once in a while and without any hassles.
New free software allows users to turn screenshots into mobile phone wallpaper
August 11, 2008 by Victor · Leave a Comment
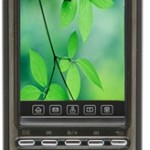 How often have you seen a photo or picture online that would look great as your cell phone background/wallpaper? Wouldn’t it be nice if you could just press one button and any picture on your PC would be formatted to the size of your cell phone’s screen?
Traditionally, one would find out the size of their mobile phone screen and then resize or crop the picture using image processing software. This can be a difficult task if you don’t know the size of your mobile phone screen in pixels.
This is where Weys comes in. Weys stands for “WhatEver You See” and is a completely free software program that allows the user to take a screen capture of their desktop PC and save it as an image the size of their mobile phone screen. The user can then upload the saved image to their mobile phone from their computer. Think of it as doing a PrintScreen to cell phone.

Screenshot of Weys in action
When the software is launched, a prompt comes up asking for the model of the mobile phone or the phone’s screen size in pixels. From there, you are able to select an area of the screen the size of your mobile phone’s screen and save it as a picture file (JPEG).
Weys can be downloaded here. This software is available for Windows only.
Jing Project
July 30, 2008 by admin · Leave a Comment
Jing Project is a free screen capture software package that is distributed online by Techsmith, the creators of SnagIt and Camtasia Studio. It is available for Windows and Mac OS X.
Jing takes screenshots or video of your screen and then stores them or uploads them. Jing is also able to record voice from the computer’s microphone input while videos of the user’s screen are being recorded.
This critical review will look at this piece of software to try to determine its usefulness and functionality.
Installation
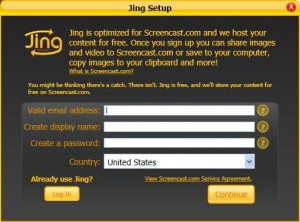
If installing on a Windows machine, Jing will prompt you to install .NET Framework 3.0, if you do not already have this installed. At the end of the installation, Jing will ask you to create a username and password. The software will not work without the creation of this account.
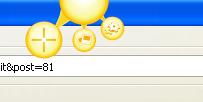
The software will start as soon as it is installed. You will notice a small yellow semi-circle at the top of your screen. Dragging your mouse over it will reveal Jing sharing options.
Recording
Start by dragging your mouse over the yellow bubble and then clicking on the capture crosshairs.
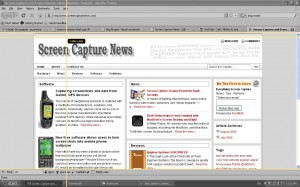
You will now be able to select what area of the screen is to be captured/shared.
Notice how a rectangular option window pops up in the lower left corner. This allows you to choose the capture format (image or video).
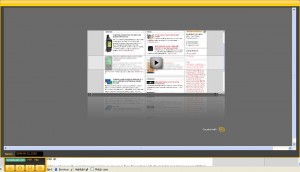
After the video or image is recored, Jing will show a preview (if it is a video) and will prompt the user as to what to do with the recording.
Unfortunately, Jing Project is only able to save the video as a flash .swf file, which means that there are no easy ways to share the recorded content. SWF flash files are great for webmasters who would like to post the recording to their site, but video sharing sites such as YouTube, Veoh, and others do not accept this as an upload format. For many, this makes the saving feature quite useless. The recording that was made via the Jing save feature is shown below:
Note that scrolling was very slow, meaning that the capture rate of Jing project is only a few frames per second. The image resolution, on the other hand, was exactly the same as the capture. Jing does not provide the user with an option to resize the output, which makes embedding high resolution flash videos into websites a pain. The video above had to be cropped on both sides due to the fact that the width of the recording made by Jing Project was unable to accommodate the width of the actual webpage.
Screencast.com Functionality and Review
The other thing about Jing Project is that it gives you access to Screencast.com, TechSmith’s content sharing portal. Think of it as a YouTube-like site for people sharing their captures. Clicking on “Send to ScreenCast: URL” will automatically upload the recording to the ScreenCast account that you signed up for earlier. Once the upload is finished, Jing Project will automatically paste the URL of your uploaded video into the Windows clipboard. You must paste it into a browser (press Ctrl + V) to reveal the link.
This is the capture that was made by ScreenCaptureNews.com: http://screencast.com/t/lCZwmjS5. Notice how there are no options to embed or share the video (like on popular video sharing websites such as YouTube or Veoh). Another disappointment is the fact that there is no option anywhere that will allow you to resize the video being viewed from its original size. This means that your audience must have monitors of your size or bigger in order to be able to view the recording in all its size and glory.
In fact, even a video of the same laptop screen did not fit into a full browser window when later being viewed on the laptop that was used to make the recording.
There is one thing to be happy about, however. Even though it looks like ScreenCast.com is an oversimplified and not fully worked out website, the absence of advertising (except for ScreenCast themselves) is always a welcome thing for a free product like Jing Project.
The Verdict?
Jing Project is an easy to use software with a very clean and intuitive interface. It does a pretty good job at capturing the area of the screen that it is told. The user is also given the option to record voice over the recorded video using a microphone. This, however, is where the good ends and the bad begins.
Videos can only be saved locally as an SWF file, which severely limits the user in options as to where to upload the video. Of course, the user can always use a 3rd party software to convert the SWF video to a format like AVI, but that complicates the proccess.
What’s more, the ScreenCast.com player is just that – a simple player. There are no options for the viewers to resize the resolution of the recording to fit the screen, and our tests showed that a bigger screen (or a higher resolution) is required to properly view a screen capture uploaded to ScreenCast.com. There are also no visible options for sharing or embedding, although this has become a standard amongst today’s content sharing websites.
The Jing Project seems like a piece of software created by TechSmith in order to get users that require more functionality to look into their other products. Specifically, Camtasia Studio, a $300 software program that pretty much extends Jing Project’s functionality and is also made by TechSmith.
Overall however, Jing Project is a decent software for those wanting an easy way to share their screen contents and store them without paying a cent. At the same time, those users that are serious about webcasting the content of their computer monitors are advised look elsewhere.


