Screenshot FX- Capture any image on Mac
August 13, 2013 by Mike · Leave a Comment
OS X has a built-in screen capture function, but it is pretty limited. For example, Command-Shift-4 lets you define a rectangle to capture. Command-Shift-4 followed by the space bar will capture a window. You can also capture your entire desktop with Command-Shift-3, and other commands will save the result to your clipboard.
Sometimes, those basic features are not enough. Apple bundles a utility called Grab with OS X that adds more features, but it still falls short for many users. Enter Screenshot FX, a very handy US$1.99 utility (on sale now) that lets you capture irregular objects by clicking on points and then dragging those points to create a curve.
The app sits in your Menu Bar waiting to be invoked, or you can hit Command-Shift-5 to bring it up. When you have outlined your object, you click on the first point, hit Return and your screenshot is saved to a location you specify in the app’s preferences.
Once your points are selected, you can modify them, or use the arrow keys on your keyboard to fine-tune the selection, either one or four pixels at a time. Any control point can be edited or deleted, giving you a lot of flexibility. The only negative is that all captures are saved as PNG files, the same format Apple uses. I’d like to see an option where I could save as a JPG, TIFF, BMP or GIF.
I tried the app with some difficult shapes, and it worked very well. I did have to refer to the built-in help to learn all the commands and key combinations, but it soon became second nature. In my work for TUAW I am constantly grabbing images like logos or screen shots of apps I am testing, so Screenshot FX is going to be a much-used item. There are similar apps around, like Screenshot Menu, which is free, but you can only draw a rectangle with it. Screenshots ($9.99) is also worth a look, as it has some nice features like sending directly to mail or iPhoto.
Screenshot FX is a handy little utility that I’ll use a lot. If you find yourself needing screenshots, and want more functionality than Apple gives you, this app is just the ticket.
Screenshot FX needs OS X 10.7 or later, and a 64-bit processor.
An Awesome New Tool for Web Based Webpage Screenshots and Annotations
July 6, 2009 by Victor · 2 Comments
Here at ScreenCaptureNews, when it comes to software, we like everything that’s free, useful, and simple. A good example of an application that abides by those three rules would be Aviary. Think of Aviary as a tool for capturing screenshots of webpages, similar to FireShot, which we earlier reviewed.
How it works
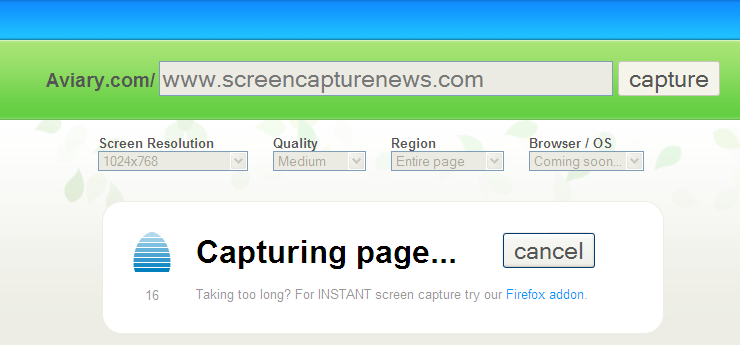
The way it works is quite simple, just place www.aviary.com/ before the URL of the webpage that you would like to capture.
Once that is done, you will be taken to a loading page, it means that your capture was successful and the Aviary image editor is starting.
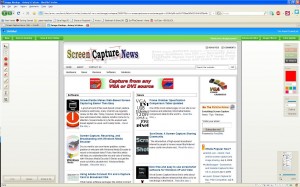
You will then be taken to a full-blown image editor, as pictured below. The features are pretty self explanatory. Once you are done editing, you may click on “save to desktop” or “save & host online,” depending on what you would like to do with your saved capture.
Advanced Screenshot Editor
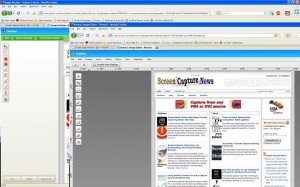
The most amazing feature of Aviary is, by far, the advanced editor, pictured below. It can be accessed by clicking on “Advanced Editor” in the top right of the window.
Those that work with Photoshop will have an easy time adapting to the advanced image editor, which tries to replicate the Photoshop interface and functions with some features like layers, history, magic wand, smudge tool, liquify tool, freeform selection tool, and more. All these features definitely make this web based applet more advanced than most free screenshot editors which need to be installed. What’s more, Aviary works with all operating systems including Windows, Mac OS and Linux, and allows for direct uploading of an image to the Aviary web servers, where you can share it with others.
Conclusion
If you don’t have a webpage screenshot editing tool that you’re used to, or if you’re looking to try something new, I would definitely recommend Aviary. It’s easy to use, it’s free, and it’s packed with features that you won’t find anywhere else!
ScrnShots: A Screen Capture Sharing Community
The introduction of high-speed broadband internet to people’s homes meant that internet users could now share vast amounts of files and information with each-other. P2P and file sharing started out with music and has evolved into a medium through which all kinds of data and information is shared.
ScrnShots has taken the evolution of online file sharing further by offering an unlimited screenshot sharing service. In other words, you can take screenshots from your computer, post them online, tag them and name them. Other people will be able to view your screenshots and comment on them and you will be able to do the same to others.
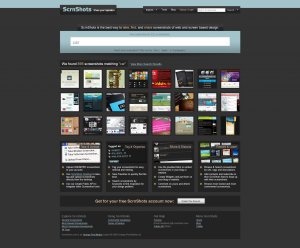
As soon as you load ScrnShots, you are able to search for screen captures simply by typing in a keyword, as in the example above. If you have an account, you may comment other people’s screenshots and upload your own screenshots to share.
Uploading to ScrnShots
Uploading to ScrnShots may be done in two ways. First, you may take your own screenshots, save as picture file and upload using a browser uploader, or you may install the ScrnShots application, pictured below.
The advantage to using the application is that you are able to instantly upload the screenshot, it is available for Windows and MAC OS.
For developers, ScrnShots offers and API for Windows and MAC OS, allowing you to integrate ScrnShots’ functionality in your own programs. In other words, using the API, a program can be made to upload images directly to the ScrnShots server.
Final Thoughts
While the idea of sharing screenshots is great, there are many other services that would accomplish the same thing, such as Flickr or Google’s Picasaweb, which also allow you to upload large resolution pictures, tag them, and search them. ScrnShots’ interface is very straight-forward and easy to use, which does make it a good service if this is what you are looking for.
PrintScreen from Windows XP or Vista on a MAC
August 11, 2008 by Victor · 2 Comments
The new generation of Intel-powered Apple computers fully supports Windows XP and Vista through BootCamp. But, due to the fact that the MAC keyboard has less keys than that of its PC counterpart, the indispensable “Print Screen” function, which lets one take a screenshot of the screen, is no longer apparent to the average user.
In order to launch the “PrintScreen” function from a Mac running Windows XP or Windows Vista through BootCamp, including MacBook, MacBook Pro, MacBook Air, Mac Mini, or Mac Pro, you must first verify if the F1-F12 keys on your machine are controlling software or hardware features of the computer. To do this, you must first access the Keyboard tab of the “Boot Camp” icon in the Windows Control Panel and check if the “Use F1-F12 keys to control software” option is selected.
If the option is selected, then the following shortcuts must be used to perform the PrintScreen command in Windows:
Shift + F11 to capture the entire screen
Alt + Shift + F11 to take screenshot of the active window only
If the “Use F1-F12 keys to control software” option is unselected and the F1-F12 keys are used to control hardware features, then the following combination of keys is to be used to perform a printscreen:
Shift + fn + F11 to capture the entire screen
Alt + Shift + fn + F11 to capture a screenshot of the active window only
You have now emulated the PrintScreen key of a PC keyboard on your Mac!
Jing Project
July 30, 2008 by admin · Leave a Comment
Jing Project is a free screen capture software package that is distributed online by Techsmith, the creators of SnagIt and Camtasia Studio. It is available for Windows and Mac OS X.
Jing takes screenshots or video of your screen and then stores them or uploads them. Jing is also able to record voice from the computer’s microphone input while videos of the user’s screen are being recorded.
This critical review will look at this piece of software to try to determine its usefulness and functionality.
Installation
If installing on a Windows machine, Jing will prompt you to install .NET Framework 3.0, if you do not already have this installed. At the end of the installation, Jing will ask you to create a username and password. The software will not work without the creation of this account.
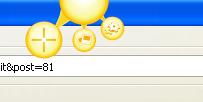
The software will start as soon as it is installed. You will notice a small yellow semi-circle at the top of your screen. Dragging your mouse over it will reveal Jing sharing options.
Recording
Start by dragging your mouse over the yellow bubble and then clicking on the capture crosshairs.
You will now be able to select what area of the screen is to be captured/shared.
Notice how a rectangular option window pops up in the lower left corner. This allows you to choose the capture format (image or video).
After the video or image is recored, Jing will show a preview (if it is a video) and will prompt the user as to what to do with the recording.
Unfortunately, Jing Project is only able to save the video as a flash .swf file, which means that there are no easy ways to share the recorded content. SWF flash files are great for webmasters who would like to post the recording to their site, but video sharing sites such as YouTube, Veoh, and others do not accept this as an upload format. For many, this makes the saving feature quite useless. The recording that was made via the Jing save feature is shown below:
Note that scrolling was very slow, meaning that the capture rate of Jing project is only a few frames per second. The image resolution, on the other hand, was exactly the same as the capture. Jing does not provide the user with an option to resize the output, which makes embedding high resolution flash videos into websites a pain. The video above had to be cropped on both sides due to the fact that the width of the recording made by Jing Project was unable to accommodate the width of the actual webpage.
Screencast.com Functionality and Review
The other thing about Jing Project is that it gives you access to Screencast.com, TechSmith’s content sharing portal. Think of it as a YouTube-like site for people sharing their captures. Clicking on “Send to ScreenCast: URL” will automatically upload the recording to the ScreenCast account that you signed up for earlier. Once the upload is finished, Jing Project will automatically paste the URL of your uploaded video into the Windows clipboard. You must paste it into a browser (press Ctrl + V) to reveal the link.
This is the capture that was made by ScreenCaptureNews.com: http://screencast.com/t/lCZwmjS5. Notice how there are no options to embed or share the video (like on popular video sharing websites such as YouTube or Veoh). Another disappointment is the fact that there is no option anywhere that will allow you to resize the video being viewed from its original size. This means that your audience must have monitors of your size or bigger in order to be able to view the recording in all its size and glory.
In fact, even a video of the same laptop screen did not fit into a full browser window when later being viewed on the laptop that was used to make the recording.
There is one thing to be happy about, however. Even though it looks like ScreenCast.com is an oversimplified and not fully worked out website, the absence of advertising (except for ScreenCast themselves) is always a welcome thing for a free product like Jing Project.
The Verdict?
Jing Project is an easy to use software with a very clean and intuitive interface. It does a pretty good job at capturing the area of the screen that it is told. The user is also given the option to record voice over the recorded video using a microphone. This, however, is where the good ends and the bad begins.
Videos can only be saved locally as an SWF file, which severely limits the user in options as to where to upload the video. Of course, the user can always use a 3rd party software to convert the SWF video to a format like AVI, but that complicates the proccess.
What’s more, the ScreenCast.com player is just that – a simple player. There are no options for the viewers to resize the resolution of the recording to fit the screen, and our tests showed that a bigger screen (or a higher resolution) is required to properly view a screen capture uploaded to ScreenCast.com. There are also no visible options for sharing or embedding, although this has become a standard amongst today’s content sharing websites.
The Jing Project seems like a piece of software created by TechSmith in order to get users that require more functionality to look into their other products. Specifically, Camtasia Studio, a $300 software program that pretty much extends Jing Project’s functionality and is also made by TechSmith.
Overall however, Jing Project is a decent software for those wanting an easy way to share their screen contents and store them without paying a cent. At the same time, those users that are serious about webcasting the content of their computer monitors are advised look elsewhere.


