Easy Screen-Grab of you Desktop
August 13, 2013 by Mike · Leave a Comment
The straight forward ‘Print Screen’ presents the simply way to grab a whole screen or window however, has it’s limitations. If you have a non-standard keyboard, or simple want to grab a particular area of the screen, you’ll need to resort to a software alternative.
Using Screen Capture tools enables powerful, flexible and intuitive screen-capturing utilities to your system. It enables you to capture anything on the screen including windows, objects, full screen, rectangle regions, freehand-selected regions, and even scrolling windows/web pages.
Many Screen Capture software tools have innovative features such as floating capture panels, hotkeys, resizing, cropping, text annotation, printing, sharing, and more.
Examples of screen capture software are Skitch for MAC and Fast Stone Capture 7.6 for Windows.
Record Android Screen Cast
August 13, 2013 by Mike · Leave a Comment
Recording Screen Casts from Android devices can sometimes be a bit tricky. A unique and simple solution is using Epiphan Systems’ DVI2USB 3.0.
There are two ways in which you can begin recording your screen cast from your android device. The first is to own a phone with an HDMI-out port. Such devices include:
Sony Xperia S
LG Optimus 2x
LG Optimus 3D P920
Motorola RAZR HD XT925
This is only a sample list, there are more devices that are frequently hitting the market so check to see if your Android device has an HDMI-out port. You will also need a HDMI cable with a standard Type A connector at one end and the Type D connector at the other (note that although it is visually similar, this is not compatible with micro-USB).
If you don’t own any of these devices, don’t worry. You can also purchase a converter that for a low price will convert signals from the micro-USB connector to the HDMI cable to record your output.
Connect the HDMI connector to Epipahn Systems’ DVI2USB3.0, which is connected to your computer you are recording to, and use the free Epiphan Software to begin recording your Screen Cast from your Android Device.
Epiphan Systems Announces New Open Source Frame Grabber
October 14, 2009 by Victor · Leave a Comment
A first in the market of high resolution video capture hardware, Epiphan Systems has announced a new open source frame grabber – Epiphan Lecture Recorder.
According to the product page, shipping of the Lecture Recorder will start sometime in November. Epiphan Lecture Recorder, or ELR in short, has some promising features that, at the price tag of $2000, are unbeatable by similar offerings.

ELR’s Unique Features
Even though this product seems to be aimed at the educational market, Epiphan Lecture Recorder has some unique features that make it a perfect frame grabber for pretty much any application. Firstly, ELR supports not only DVI and VGA capture, but also has on-board inputs for composite video and stereo audio.
Furthermore, Epiphan Lecture recorder has a very generous 32GB of buffer memory, which is expandable via portable flash sticks, network drives, or external hard disks.
Finally, ELR features 5 USB ports for external devices and peripherals, meaning that you can create software that will allow you to connect external control devices such as IR remotes, CD/DVD writers, wireless modules, an so on.
Open Source
As mentioned earlier, Epiphan Lecture Recorder will be an open source device. What this means for developers is that it is possible to access all features of the frame grabber. And, because the ELR is more of an embedded computer or internet appliance, many interesting applications can be written for it. For example, the ELR, as it has an Ethernet network interface, can function as its own server, as pictured below.

In a Nutshell
The Epiphan Lecture Recorder is more of a computer with on-board frame grabber and video and audio capture cards than it is an actual frame grabber. While this might not be the ideal device for the general public, the ELR could be used as a platform for a wide variety of applications.
Click here to view Epiphan Lecture Recorder’s product page on Epiphan Systems’ website.
Capturing Video from Nintendo DS
July 7, 2009 by Victor · 8 Comments
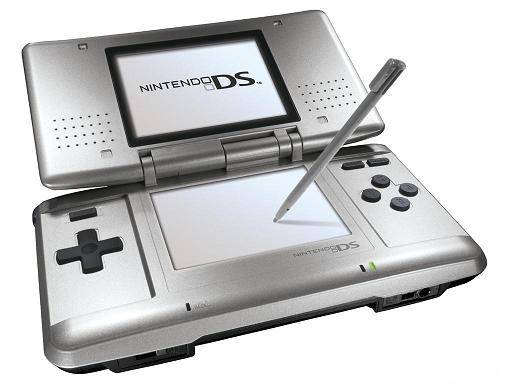
While some portable game systems like the Sony PSP have built-in screen capture, the DS from Nintendo is disadvataged in this respect. There is no simple way of capturing the screen by recording to a file, and the DS does not have a TV-out. This article will review and discuss several ways of recording videos from a Nintendo DS or DS Lite, as well as replicating the DS’ screen on a TV.
TV-out devices
The first way to output your DS’ screen to a monitor or TV is by using a third party TV-out device made specifically for the Nintendo DS. Initially, there were two different models available, but only one is being produced now.
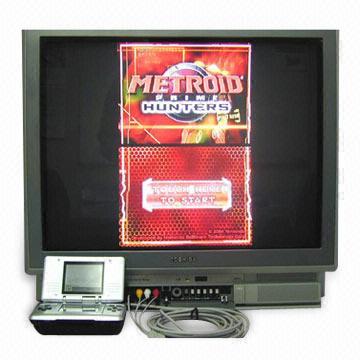
The now discontinued DS to TV adapter was made in Taiwan by Q-Mark. This is the best TV-out device available for the DS, letting you see the output of both LCD screens on a TV. The downside to the Q-Mark device is that the DS has to be modified in order to accomodate the TV adapter, making it bulky and less portable. The Q-Mark device is shown below.
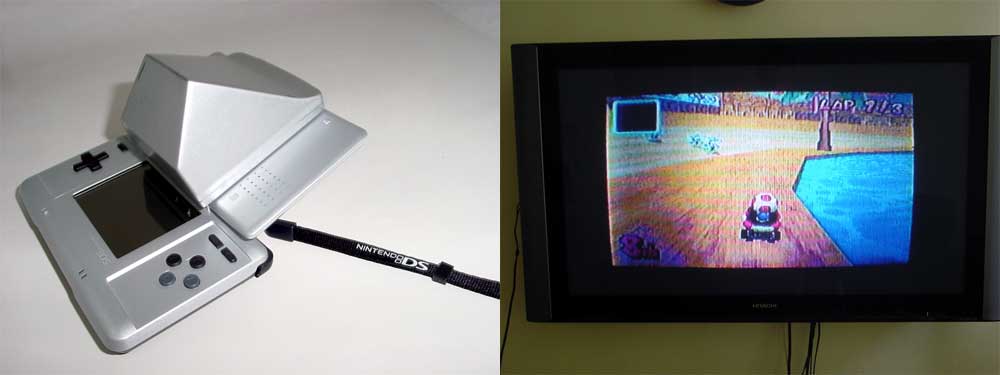
Another screen capture device for the Nintendo DS is the camera-based “Video Game Controller Adapter,” also made by Q-Mark. It can be purchased here and consits of a small device the slips over the upper screen of the DS, pictured below.
The latter device consists basically of a camera that is pointed at your screen, and, because of the way it is attached to the DS, only one screen is visible. Of course, quality is compromised as the camera optics are not of extremely high quality and lighting conditions severely impact this device’s operation.
Either way, if it becomes hard to find the DS to TV adapter and only the camera-based Q-Mark unit is available, it is still tolerable, as long as you intend on playing on one screen only.
Recording and broadcasting video from the Nintendo DS if using TV-out devices
If one of the devices mentioned above is used with the Nintendo DS, and the goal is to capture the video in order to record it, share it on a site like YouTube, or broadcast it, any capture card or video card with Video-in (RCA) will do the trick. YouTube even supports on-the-fly recording, so as long your capture card or video card is set as the webcam device in Windows, and your DS is connected to your capture card via one of the DS-to-TV adapters mentioned above, you’re ready for recording!
For live broadcasts, a variety of software can be used, but we recommend the free Windows Media Encoder. Details on how to use Windows Media Encoder in order to broadcast a video stream from an external device can be found here.
Using an Emulator to Record Gameplay
Using a software emulator on a computer is the cheapest and best way to record gameplay of the Nintendo DS, but is only really suited for short operations and not intended for lengthy game play. An emulator is a software program which replicates the functions of the Nintendo DS. In order to load games to it, you will need to find “ROMs” of each game. Downloading ROMs may be illegal depending on the laws of the country where you live.
Follow this link for a list of free emulators for the Nintendo DS. Once the emulator of your choice is up and running, you must simply capture your screen using either software for screen capture (we have reviewed lots of different programs in our Software as well as News sections) or by connecting a frame grabber to your computer monitor.
ScreenCastle Makes Web-Based Screen Capturing Easier Than Easy
A good amount of free web-based screen capture solutions exist today, many of which we regularily review on this site. Today, however, ScreenCastle a new web-based video capture solution came to my attention.
ScreenCastle is by far the easiest web based applet I’ve used, and it really holds true to its “One Click Screencasting” philosophy. ScreenCastle brings the following features to its users:
- 100% free
- It is possible to record fullscreen or to choose the part of the screen to record
- Unlimited fullscreen resolution recording.
- Audio recording (from primary audio recording device such as computer mic)
- Unlimited video length
- Unlimited maximum number of videos
- No registration
Features like unlimited resolution, length, and number of videos truly make this applet stand out from the crowd. There is also an API provided for developers who would like to integrate this technology into their own websites and applications.
Using ScreenCastle
As soon as you open screencastle.com, you will see the huge red button to the right. That is what needs to be clicked in order to begin the screen capture.
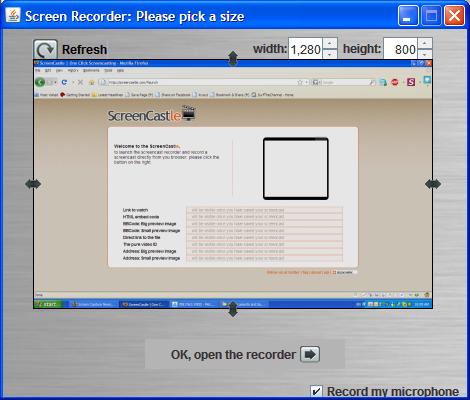
After you click the button, a security warning comes up, you must accept it for the recording to work, as ScreenCastle needs to gain access to your computer. After that, ScreenCastle lets you choose if you would like to record your entire screen or just a part of it. You are also able to record from your mic by ticking the checkbox in the lower bottom of the window. Once you are finished configuring the recorder, the arrow at the bottom must be selected.
You will now see a black bar at the top of your screen. Click on “start recording” for the recording to start, and then go back to the top of the screen and select “stop recording,” then “save” in order to save your video. This is where I was disappoined. I attempted to record a minute of HD video and even though it was recorded, the video was unable to proccess, thus making ScreenCastle not all that it is made out to be.
I then went ahead an recorded some simple internet browsing with some standard definition YouTube video (near the end of the video). That didn’t work either. I tried recording 10sec of browsing a text webpage, and although it did get to the uploading step, the video never actually proccessed. I am assuming this is a temporary problem with the site and will be fixed. Once it is, samples of video recordings will be added.
Finally, assuming the uploading and processing does work, ScreenCastle gives you several ways to share your video:
- Link to watch (YouTube-like streaming Flash video)
- HTML embed code
- BBCode (for posting video to forums and message boards)
- Direct link to media file
- Preview images (for linking to video)
Conclusion
ScreenCastle is a great idea, is easy to operate, and seems to work smoothly until you get to the final step. No matter what scenarios and resolutions were thrown at it, ScreenCastle would not let me upload any of my recordings. As such, ScreenCastle’s video recording quality cannot really be judged until that bug is fixed.
VGA2LAN Development Kit to revolutionize VGA capture market
May 26, 2009 by Victor · 2 Comments
When an organization, company, or individual has an idea for a VGA capture-based product, such as a webcasting system, a recorder of VGA signals, or any other VGA-related hardware product, a separate frame grabber is purchased, mated with a PC with software, packaged, and sold.
Solutions for capturing, broadcasting and recording presentations and seminars are often rediculously expensive ($10 000+) due to the fact that the original cost of the hardware (frame grabber + capture card + PC + peripherals) runs at half the retail value of the actual product. Not only did this make VGA capture-based solutions unaffordable to some, it also meant that educational institutions such as school and colleges had to spend an arm and a leg if they were to outfit every single one of their classrooms with such devices.
In order to solve this problem, Epiphan Systems has announced and is now shipping a new product aimed at capturing the market of developers, power users, and integrators – the VGA2LAN Development Kit. With a fully open-source architecture, a custom Linux build environment, access to all drivers and ports, the VGA2LAN is poised to create a revolution in the industry.
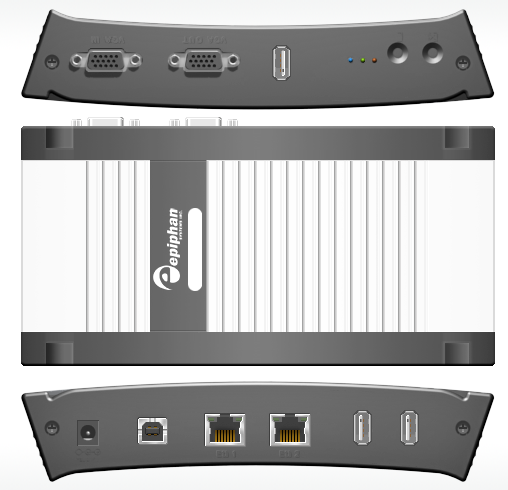
VGA2LAN Development Kit
What is it?
The VGA2LAN platform is based off of a Motorola PowerPC chipset and comes preinstalled with a custom build of Ubuntu. The basic specifications are as follows:
- 1 VGA input with integrated frame grabber
- 1 VGA output
- Integrated Gigabit Ethernet hub
- 5 USB 2.0 ports (4 external + 1 internal)
- No moving parts
In other words, the VGA2LAN is effectively a small PowerPC-based computer with an integrated frame grabber.
VGA Capture
Of course, what interests us most is the quality of VGA capture that this device can achieve. Does it really make sense to develop products using the VGA2LAN platform or is it still better to use an internal or external frame grabber paired to a PC? The basic specs are listed below and a full list of specifications can be obtained at Epiphan Systems’ web page:
- 2048 x 2048 maximum resolution
- 120 frames per second maximum capture rate
- Lossless quality
- 270 Mpixels/s pixel rate, 532Mpixels/s if interlaced
The specifications of the integrated frame grabber are comparable to those found in high-end devices costing upwards of $2000. A detailed comparison of VGA frame grabbers can be found here. And, since the price of the VGA2LAN Development Kit is under $1000, it makes sense to use it instead of a computer + frame grabber combo often costing 5 times that amount.
A Platform for Next Generation Internet Appliances
The VGA2LAN does not come with any internal memory. However, USB 2.0 flash memory drives can be purchased for pennies on the dollar and are sold in all capacities up to 128GB, meaning that you have plenty of buffer space to work with. Furthermore, the 4 external USB ports can be used to connect external hard drives and other storage media, such as CD, DVD, or Blu-Ray burners, infinitely expanding the VGA2LAN’s storage capacity.
Since the VGA2LAN is an open source platform, devices such as USB Wi-Fi antennas can be connected in order to provide wireless communications, should the integrated Gigabit Ethernet network card not be sufficient for your application. Furthermore, the presence of USB 2.0 ports means that peripherals suchs as keyboards, mice, AMX/Crestron control units, and others can be interfaced with the VGA2LAN, making it perfect for virtually any application that involves the capture of VGA signals.
The VGA2LAN Development Kit is a great way to build, use, and sell hardware products for a company or organization that doesn’t have the resources, finances, or expertise to manufacture their own capture hardware. And, at a price of $999 US, it is most definitely a bargain.
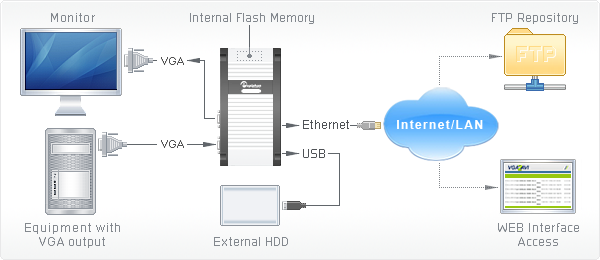
Example of how VGA2LAN can be used
New Web-Based Screen Capture Utility Now in Beta
October 27, 2008 by Victor · 3 Comments
Here at ScreenCaptureNews, we like all things that are simple to use and don’t cost an arm and a leg. ScreenToaster is a completely free exciting new web-based Java applet similar to ScreenCast-O-Matic. You can read our full review of ScreenCast-O-Matic here. While ScreenCast-O-Matic was an easy applet to use, we did find some problems, notably the ultra-low capture rate (~2fps), that took away from the usefulness of this application.
ScreenToaster is basically an online applet that records your screen or an area of your screen and then instantly publishes the recording to the web in Flash YouTube-like format for you to share with your peers or co-workers. This can come in extremely useful in situations where you need to demonstrate to someone how to use a piece of software, create instructional videos, or upload a video of your screen for others to see for troubleshooting purposes.
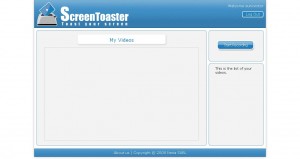
While ScreenToaster is still in Beta, you will need an activation key to use it. The activation key can be requested by going to the registration page of the ScreenToaster website. Once you have registered your user account and logged in, ScreenToaster will bring you to your control panel. From here, you will need to press “Start Recording” to launch the recording proccess. You will also be prompted to install the ScreenToaster Java applet, which you must accept.
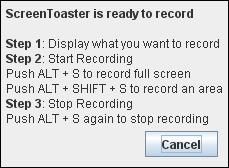
Once you have clicked on “Start Recording,” ScreenToaster will display a small info box which explains how the software works. It is rediculously easy to understand and use. First, you must bring forward the application which you would like to record. Then, pressing “ALT + S” begins a recording of your entire screen, whereas “ALT + SHIFT + S” allows you to select an area of your screen to record. Finally, once you are done recording, “ALT + S” must be pressed again in order to publish the video.
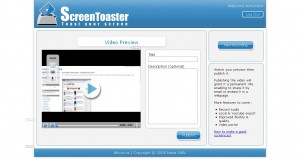
Once you have finished recording (after pressing ALT – S), you will be taken back to the ScreenToaster control panel where you’ll be able to see your recording.
Using the three options on the left side of the video preview, you can add subtitles, audio, or change the preview shot of the video.
You must now name and describe your video. When you are done, click on “Publish”
Unfortunately, we at ScreenCaptureNews were unable to publish any videos due to the fact that it gave us an error every time that we hit “Publish”. The developers of the software wrote to us and said that, because the software is still in beta, bugs do pop up from time to time.
What we saw in the preview, however, was fairly decent. The frame rate was pretty good and it even recorded a video off of YouTube at about 20fps, which is a ten-fold difference between ScreenCast-O-Matic. ScreenToaster was also exceptionally easy to use and overall is a promising web applet.
The developers of ScreenToaster claim that the application works with Windows, Mac OS X, and Linux. ScreenToaster will always be free and will most likely be ad-supported once it is released to the general public. Tentative release date, according to ScreenToaster staff, is “end of October”. We’ll keep you posted with a full review once ScreenToaster is out of beta.


