Screenshot FX- Capture any image on Mac
August 13, 2013 by Mike · Leave a Comment
OS X has a built-in screen capture function, but it is pretty limited. For example, Command-Shift-4 lets you define a rectangle to capture. Command-Shift-4 followed by the space bar will capture a window. You can also capture your entire desktop with Command-Shift-3, and other commands will save the result to your clipboard.
Sometimes, those basic features are not enough. Apple bundles a utility called Grab with OS X that adds more features, but it still falls short for many users. Enter Screenshot FX, a very handy US$1.99 utility (on sale now) that lets you capture irregular objects by clicking on points and then dragging those points to create a curve.
The app sits in your Menu Bar waiting to be invoked, or you can hit Command-Shift-5 to bring it up. When you have outlined your object, you click on the first point, hit Return and your screenshot is saved to a location you specify in the app’s preferences.
Once your points are selected, you can modify them, or use the arrow keys on your keyboard to fine-tune the selection, either one or four pixels at a time. Any control point can be edited or deleted, giving you a lot of flexibility. The only negative is that all captures are saved as PNG files, the same format Apple uses. I’d like to see an option where I could save as a JPG, TIFF, BMP or GIF.
I tried the app with some difficult shapes, and it worked very well. I did have to refer to the built-in help to learn all the commands and key combinations, but it soon became second nature. In my work for TUAW I am constantly grabbing images like logos or screen shots of apps I am testing, so Screenshot FX is going to be a much-used item. There are similar apps around, like Screenshot Menu, which is free, but you can only draw a rectangle with it. Screenshots ($9.99) is also worth a look, as it has some nice features like sending directly to mail or iPhoto.
Screenshot FX is a handy little utility that I’ll use a lot. If you find yourself needing screenshots, and want more functionality than Apple gives you, this app is just the ticket.
Screenshot FX needs OS X 10.7 or later, and a 64-bit processor.
Greenshot – A Free Open Source Screenshot Tool for Windows
November 10, 2010 by Victor · Leave a Comment
Greenshot is yet another recently released free screenshot tool for windows.

Key features of the Greenshot software include:
- Capture the entire or part of the screen
- Create annotations and highlights
- Save as a file, send to clipboard, or e-mail the captured file
In other words, this software is not much different than other screencap programs that we’ve reviewed. However, Greenshot has one thing that other applications do not – its’ source is released under the open GPL license meaning that this software can be used in a commercial application. Not bad for those that want to include good screen capture/annotation functionality in their custom software.
Greenshot is available for free at www.getgreenshot.org.
ScreenSnapr: Yet Another Screen Capture Utility Released in Beta
September 8, 2009 by Victor · 2 Comments
If you haven’t picked a favorite screen capture utility, here’s one that you may want to put on your list of apps to try, especially if you want to upload your captures to an FTP server.
ScreenSnapr is a simple screen capture utility. The free version has no expiry date and lacks some of the more interesting features such as posting screenshots to Twitter, something that the full version includes, for a fee of 5$.
Since paying for screen capture applications is nonsense (browse our website to see that there plenty of free apps available), let’s have a look at the features of the free version:
- Unlimited 1-click uploads
- Custom FTP uploads
- URL shrinking
- Custom GUI
- Dual-monitor support
Using ScreenSnapr
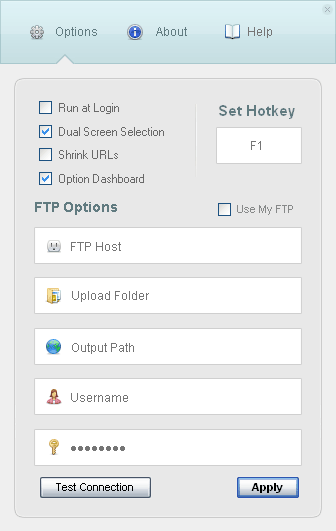
ScreenSnapr is launched by a shortcut that is predefined within the program. The program settings are very simple and self-explanatory. FTP settings are easily configured.
A simple window pops up as soon as you create the shortcut. Note that the Tweet option is not functional in the free version of ScreenSnapr.
Conclusion
ScreenSnapr, while still in beta, is a very simple application with no real features that make it stand out. Even free web-based screen capture tools such as Aviary are more advanced than ScreenSnapr, and do not require a payment to use the full version.
Overall, it’s a nice program if you often upload screenshots to FTP, but otherwise it’s best that you evaluate some other alternatives, many of which are available by browsing this site.
You may read more about and download ScreenSnapr at ScreenSnapr.com.
Shutter – A Tool for Linux Screenshots
August 15, 2009 by Victor · Leave a Comment
Shutter is a fully-featured screenshot tool for Linux. Within one window, Shutter lets you take a screenshot of the screen, a window, or an area of the screen, edit it, and upload it to the web. Shutter is fully open source and, according to their website, has the following features:
Features:
- take a screenshot of your complete desktop, a rectangular area or capture a website
- take screenshot directly or with a specified delay time
- save the screenshots to a specified directory and name them in a convenient way
(using special wild-cards) - Shutter is fully integrated into the Gnome Desktop (TrayIcon etc.)
- generate thumbnails directly when you are taking a screenshot and set a size level in %
- Shutter session collection
- keep track of all screenshots during session
- copy screeners to clipboard
- print screenshots
- delete screenshots
- rename your file
- upload your files directly to Image-Hosters (e.g. http://ubuntu-pics.de), retrieve all the needed links and share them with others
- edit your screenshots directly using the embedded drawing tool
It works like your standard screen capture program (we review such programs all the time) and does not yet have a video recording feature. The program can be set to run automatically as soon as you press the PrtScn or Alt+PrtScn buttons. Read here about configuring Shutter to activate automatically.
Extended Features/Plugins
One neat thing about Shutter is the support of plugins.

These plugins are able to create effects similar to those in GIMP and PhotoShop but directly in Shutter, making it a nice tool for web developers who want to add effects to images on their website, but either don’t have the expertise or the time to do so. All plugins have a slate of settings to make your image look just the way you want it.

Uploading your Images
Shutter lets you upload your screen captures to a wide variety of free image sharing websites. One of the neatest feature of the upload feature is that you get embed and direct links to the uploaded images right away, without the need to launch a browser.

Conclusion
Shutter is a very powerful and fully-featured tool for capturing still screenshots within a graphical Linux environment. As a matter of fact, it surpasses many of its’ Windows counterparts in features, ease of use, and usability. For more information about Shutter for Linux visit http://shutter-project.org/.
PrintScreen.Me: Extend your PrintScreen Functionality
July 24, 2009 by Victor · Leave a Comment
Are you a frequent user of the PrintScreen key? Ever wanted to get more out of that button? Sure, you can paste from the PrintScreen clipboard to any image editing or annotation program of your choice, but now there is a free alternative that extends the PrintScreen button’s functionality and makes it easy to create annotated screenshots and upload them right away to an image sharing site of your work. PrintScreen.Me works in four easy steps:
- Capture your screen with the PrintScreen button
- Annotate, draw, and add notes to your screen capture
- Upload screenshot directly to Facebook, Twitter, Picasaweb, Flickr, or PrintScreen.Me’s free image server.
- E-mail, print, or archive the screen capture.
Using PrintScreen.ME
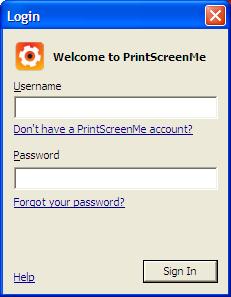
You must first download and install the PrintScreen.ME program, it is available as a free download and works with Windows machines only. Once you install the program and run it, it will prompt you for a user name and password:
You must set up an account over at PrintScreen.ME. Luckily, the only personal information that is asked for is an e-mail. If you don’t want to disclose your e-mail address, however, anything may be entered into the box, as PrintScreen.ME does not require e-mail verification. After creating your account, you will be prompted to enter your account names and passwords for photo sharing sites like Facebook, Flickr, Twitter, etc.
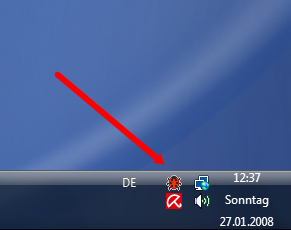
The entire setup process takes less than 2 minutes. Once the program is installed, an icon should appear in the lower right (this screenshot was created with PrintScreen.ME):
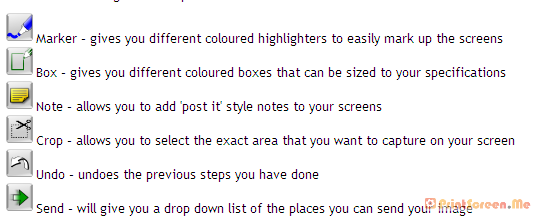
Now, upon pressing the PrintScreen button you will be able to use PrintScreen.ME to edit and upload your screenshots. Here is a more detailed breakdown of PrintScreen.ME’s annotation features:
The verdict?
PrintScreen.ME is an extremely easy tool to use and comes in very useful. However, it has one huge drawback which is my reason for removing this program after using it for a day – no dual-screen support. This means that there is no way to capture the image on your second screen. It’s very upsetting that a fairly good program would not support such features, when the standard PrintScreen functionality in Windows camptures multiple monitors without a problem.
An Awesome New Tool for Web Based Webpage Screenshots and Annotations
July 6, 2009 by Victor · 2 Comments
Here at ScreenCaptureNews, when it comes to software, we like everything that’s free, useful, and simple. A good example of an application that abides by those three rules would be Aviary. Think of Aviary as a tool for capturing screenshots of webpages, similar to FireShot, which we earlier reviewed.
How it works
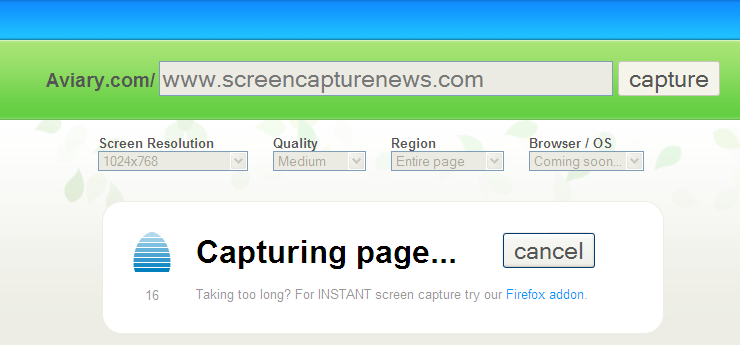
The way it works is quite simple, just place www.aviary.com/ before the URL of the webpage that you would like to capture.
Once that is done, you will be taken to a loading page, it means that your capture was successful and the Aviary image editor is starting.
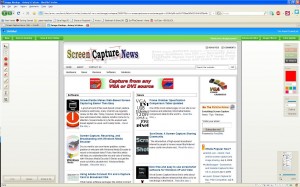
You will then be taken to a full-blown image editor, as pictured below. The features are pretty self explanatory. Once you are done editing, you may click on “save to desktop” or “save & host online,” depending on what you would like to do with your saved capture.
Advanced Screenshot Editor
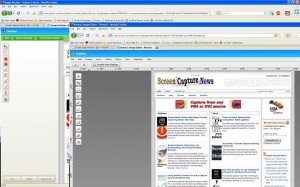
The most amazing feature of Aviary is, by far, the advanced editor, pictured below. It can be accessed by clicking on “Advanced Editor” in the top right of the window.
Those that work with Photoshop will have an easy time adapting to the advanced image editor, which tries to replicate the Photoshop interface and functions with some features like layers, history, magic wand, smudge tool, liquify tool, freeform selection tool, and more. All these features definitely make this web based applet more advanced than most free screenshot editors which need to be installed. What’s more, Aviary works with all operating systems including Windows, Mac OS and Linux, and allows for direct uploading of an image to the Aviary web servers, where you can share it with others.
Conclusion
If you don’t have a webpage screenshot editing tool that you’re used to, or if you’re looking to try something new, I would definitely recommend Aviary. It’s easy to use, it’s free, and it’s packed with features that you won’t find anywhere else!
Create Massive Screenshots from Webpages in Internet Explorer
November 12, 2008 by Victor · Leave a Comment
There are many screen captutre programs that capture webpages from web browsers, such as the popular FireShot software for Firefox that we reviewed earlier. However, FireShot captures what you see on your screen only, and does not actually save the enitre webpage, which can be several pages long, as an image file.
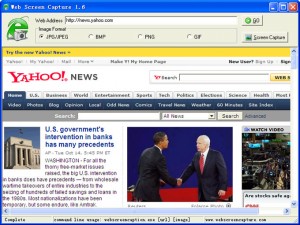
Web Screen Capture is a small and free utility for making screenshots of webpages in Internet Explorer. It differentiates itself from other capture utilities by performing only this function and nothing else.
Using Web Screen Capture on the following webpage:
You end up with this *massive* screenshot:
This can be useful if you want to save the entire contents of the page as an image file (Web Screen Capture does JPG, GIF, PNG and JPG) and not just an area of your screen.
Web Screen Capture does not need to be installed and weighs in at under 1MB in size. This means that it can be used on public computers which don’t allow the installation of external computer programs. As well, Web Screen Capture can automatically batch convert multiple webpages to images or be launched through the command line.
For those wishing to integrate webpage screen capture into their existing software, the command line interface of Web Screen Capture can prove to be very simple to implement. Best of all, it’s all completely free!
Download Web Screen Capture here.
Read more about free screen capture programs and alternatives here.
Screenshot Software for Advanced Screen Capture, Screen Capture Annotation, and Tracking Bugs
If you’re a software developer, you know how аnnoying it is to try to understand a bug report which someone has sent you regarding your software. A picture is worth a thousand words, and a screenshot is worth more than any good text-based bug report.
Bug Shooting, a Windows-only application, not only captures screenshots and allows the user to edit and annotate them, it also allows the user to automatically send the screenshots over Skype, e-mail, or each of these bug trackers:
– FogBugz
– Gemini
– OnTime
– BugTracker.NET
– SharpForge
What’s more, Bug Shooting is absolutely free and also has the ability to send screenshots to any application using a command line interface. This means that you can integrate Bug Shooting’s functionality in your own software and custom applications with ease.
Functionality:
- Capture screen
– Capture windows
– Capture screen area
– Delayed capture
– Support for multiple screens
- Edit screenshot
– crop
– resize
– add geometric shapes
– add arrows
– add text
– add images
– rotate, flip
- Print screenshot
– Save screenshot
– Open screenshot from file
– Combine screenshots
- Shortcuts are possible for a lof of functions
- Send screenshots to different bug tracker
– FogBugz
– Gemini
– OnTime
– BugTracker.NET
– SharpForge
- Send screenshots to
– Skype
– Default Email Client
– Any application by using command line
- Multilingual
– English
– German
– Russian
- Custom commands: open an URL by shortcut
- Screen magnifier
- Automatic update function
- Silent installation and uninstallation
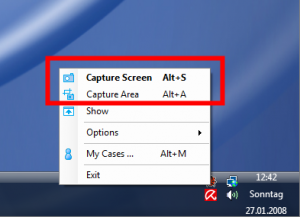
Bug Shooting constantly runs in your taskbar. Thus, it’s menu is activated by right-clicking on the little ladybug icon.
From here, you can select if you would like to capture your entire screen or just an area of your screen. Alternatively, you can press Alt+S to capture your screen from any application that is running or press Alt+A to bring up the “capture an area of a screen” function.
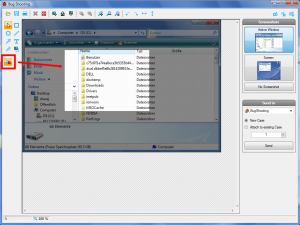
Bug Shooting has a pretty extensive interface, shown below, for editing your screen captures and sending them to a bug tracker or other application.
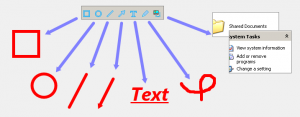
Bug Shooting also provides the user with a good amount of annotation tools, including formattable text, arrows, circles, squares, and so on…
Finally, Bug Shooting provides the user with a choice of which application to send the screenshot to.
Final Thoughts & Comments
Bug Shooting is one of those great, free, screen capture programs that has a nice, refined interface, takes up little system resources, and is extremely easy to use. Even though the original purpose for Bug Shooting is for creating bug reports out of screenshots, it is still a good application to use for general screen capturing of images. You may also want to compare Bug Shooting to the other similar applications which we have reviewed, all of which can be found in the Software section of ScreenCaptureNews.
A Brilliant Way to Quote
October 15, 2008 by Victor · Leave a Comment
How often have you wanted to quickly grab a screenshot of a webpage and post it online, publish it to a forum, e-mail it to your friends, or just save it to your computer? Of course, all these tasks are easily accomplished by complicated programs or browser add-ons, but what if you could do all that without ever actually installing anything?
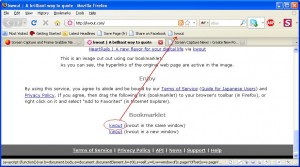
This is where Kwout (pronounced like “quote”) comes in. Kwout is what is called a bookmarklet and is launched simply by adding the link provided to your bookmarks and then launching the bookmark. For convenient use, you can drag the link directly onto your toolbar, as shown below.
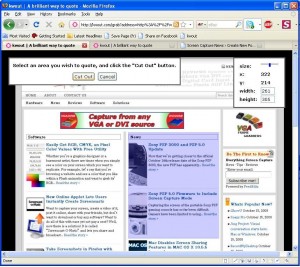
That’s it! You can now take screenshots of webpages, images on webpages, and even save text with links by going to the bookmark that you just added. When you see something on a website that you would like to save, simply click on the bookmark and follow the easy to use proccess. First, you will have to select the area of the webpage that you want to capture and click on “Cut Out”.
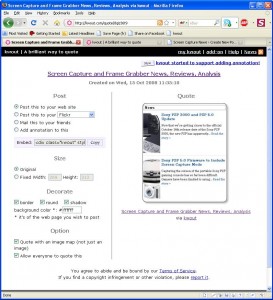
You will now be shown your captured area. At this point, you can customize the way it looks, add annotations, and select where to post it. You can copy/paste the HTML code given to put it directly on your site or blog, you can e-mail it to your friends, or post it to one of these photo-sharing and content sharing sites:
- Flickr
- Tumblr
- Blogger
- Vox
- sa.yona.la
- Livedoor Blog
- Ameba Blog
- Hatena Diary
- Excite Blog
- Cocolog
- So-net Blog
That’s it! You have now posted an exceprt/screenshot from another webpage! Keep this tool in your bookmarks, it’s easy to use and absolutely free. You never know when it could come in handy.
Source: http://www.kwout.com/
Sony PSP 3000 and PSP 5.0 Update
October 8, 2008 by Victor · 11 Comments
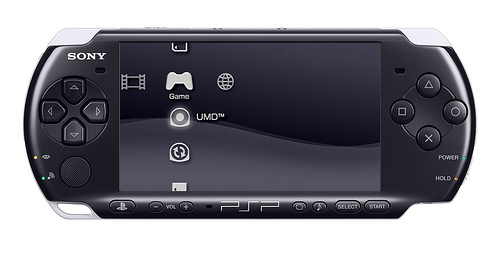
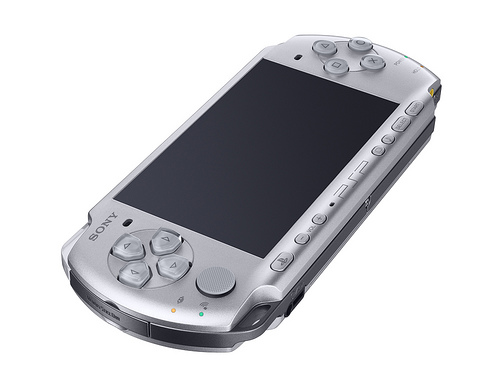
Now that we’re getting closer to the official October 14th release date of the Sony PSP 3000, the new PSP has apparently been popping up all over Best Buy stores in the US. Here is a picture of the new PSP 3000, packed with the Ratchet and Clank: Size Matters bundle.
If you’re lucky enough to convince the sales rep to sell it to you (they aren’t supposed to sell them before the 14th, but some do anyways), then you will find, besides the actual console, game, cables, instruction manuals, a 1GB memory card. It is surprising that Sony didn’t include a 4GB card, but it seems like they’ll be selling the PSPs with 4GB memory sticks once the 1GB cards run out.
Sony PSP 5.0 Firmware Update
The new Sony PSP 5.0 firmware update will include the following features:
- PSN (PlayStation Network) Access. This means that gamers will now be able to use the PSP for multiplayer online games. Most new releases will now have full multiplayer support, with possible access to the PlayStation Store. Users will also be able to chat with eachother directly through their PSPs.
- RSS Reader. While there is an RSS reader in the current release of the firmware, it is quite buggy and is not easy to use. The new RSS reader will be completely redesigned to address all of the features which Sony has received complaints about. The new RSS reader, besides having support for images and videos, will also have support for text.
- Screenshot mode. Users will now be able to take screenshots of their in-game action, which was something impossible with the previous firmware revisions. The screen captures will then be saved to the Memory Stick. Most likely, full support for screen captures will only be available in newly released games.
PSP 3000 Hardware
So you now know about the new firmware. Now, let’s see what’s new on the hardware side of the PSP 3000, and is it really much better than the PSP 2000?
The new PSP has a more refined look than the PSP-2000. Sony has also done a lot of research in the ergonomics of the device, which have also been improved. Some of the ports on the PSP have been moved around to provide easier and better connectivity. The TV-out feature has also been improved to support TVs without progressive scan, whereas only progressive scan TVs were able to function with previous hardware version of the PSP.
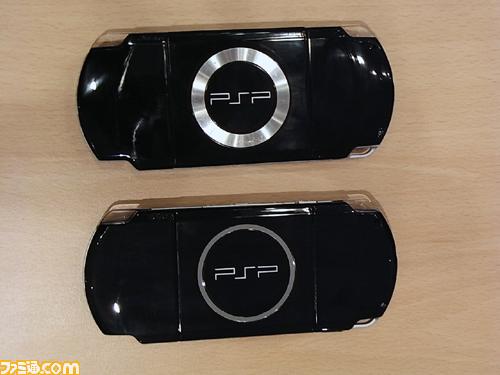
Sony has also decided to add an integrated microphone to the PSP 3000, located just below the LCD screen. This feature would be very welcomed by those who use Skype on the PSP. It would even allow future games to support in-game voice chat (similar to TeamSpeak on PC). The rear (back) panel has also been refined for a different look, pictured below.
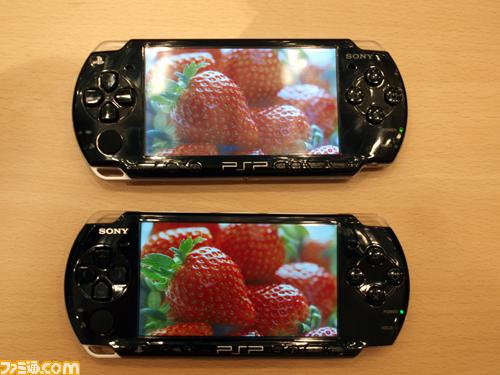
The biggest hardware improvement, however, is the new LCD screen. This really is a feature worth switching to the PSP 3000 for. This screen is probably the crispest and brightest of any portable video game console available on the market. The PSP 2000 is pictured above, while the PSP 3000 is at the bottom of the picture. Check it out:
For those users who absolutely need to know the specs of the new PSP 3000, Sony has announced the official specifications, shown below.
Sony PSP 3000 (PlayStation Portable) Specifications
Size: 169.4 x 18.6 71.4 mm / 6¾ x ¾ x 2¾ in
Weight: 189g / 6.7oz (with the installed battery)
CPU: System clock frequency 1-333MHz
Main Memory: 64MB
Display: 4.3 inches (16:9) full-transparent type, 480×272 pixel, 16,770,000 colors
Sound: Built-in stereo speakers
Main input/output: Wireless LAN (IEEE 802.11b) (Wi-Fi)
High Speed USB (USB2.0) (mini-B)
Memory Stick PRO Duo™
Analog Video Out
Microphone
Main connectors: DC IN 5V connector; DC OUT connector; Video out/headset connector; USB connector
Memory Stick Duo™ slot
Power sources: Lithium-Ion rechargeable battery pack
AC adaptor
USB power supply
Internal disc drive: Read-only UMD™ drive
Access control: Region code, parental control
Ad hoc mode (connects up to 16 consoles)
Supplied accessories: AC adaptor
Battery pack (1200mAh)
The verdict? Two thumbs up from us! Sony really did listen to gamers’ views on the old PSP and has added some cool and, more importantly, useful features to make the PSP experience even better than before! If you’re still considering buying a PSP, then the PSP 3000 is the one to get!
More links/sources: Sony Official Press Release, QJ.net, Walyou.


